Homemade yogurt is easy-peasy, and these cheese balls are YUMMERS!
Do these not look DE-LUX-I-O-ISHES? I was inspired to create this recipe after tasting a cheese dip at one of the booths at the Old Strathcona Farmer’s Market. I am pleased with this flavour combination, but this is the kind of dish that begs you to play with other flavour combinations. They are wonderful spread on a cracker or on toast – luscious, creamy, and bursting with flavour.
Homemade Yogurt
Ingredients
- 2 litres of whole milk (or 2 quarts)
- 60 grams of natural , plain yogurt* (or 1/4 cup)
- *the ingredients on the side of the plain yogurt you choose to purchase must read only yogurt culture and milk solids; there must be no artificial ingredients , chemicals, or gelatine
Instructions
-
Place the milk in the TM bowl; cook at 80 degrees Celsius 20 minutes at speed 2-3
-
Cool milk in the TM bowl to 37 degrees Celsius (take lid off); set your timer and check back every 15 minutes, or cool in the fridge and set timer for 20 minutes (do not let the milk cool to room temperature or below 37 degrees Celsius)
-
Add yogurt culture to the warm milk; combine for 5 seconds at level 1-7
-
Heat mixture at 37 degrees for 20 minutes at level 2-3
-
Pour into ThermoServer, cover; set on counter for 5 hours
-
Place in refrigerator overnight; yogurt will thicken overnight and be ready to serve
Recipe Notes
Remember to retain enough of this yogurt for your next starter.
Measure the milk into the Thermomix bowl, and turn it on: time temperature (in Celsius), and speed.
Cool the “cooked” milk in the fridge with the lid off until 37ºC, and then add the yogurt culture (plain yogurt).
And, again: time, temperature, and speed. Done to foam perfection.
Pour the yogurt into a thermal bowl, cover, and leave on the counter for 5 hours. Then refrigerate.
You will find a creamy, glossy, thick white yogurt ready to mix into your homemade granola for a nutritious, delicious, and healthy breakfast!
Yogurt Cheese
Ingredients
- One batch of homemade yogurt made from 2L whole milk
Instructions
-
Place the tea towel, or cloth into the straining basket or onto the Varoma steaming tray
-
Pour all of the refrigerated yogurt into the straining basket or onto the Varoma steaming tray, ensuring all goes inside of the cloth
-
Set the straining basket or onto the Varoma steaming tray into a larger bowl, or over the sink, to drip into, ensuring that the basket or tray is well above the dripping area
-
Leave this over night, or for 8-10 hours; replacing the cloth and turning on the straining tray about 6 times during this process to enable a firmer, and creamier final product
-
When the cheese peels or falls away from the cloth easily, it is done!
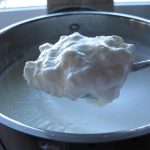
The batch below is just ready to be taken out of the basket. I have removed it from the sink grate and am just admiring the texture of it. It is sitting in a dishcloth I used at the end of the process. There is far too much volume at the beginning, and a tea towel, or a larger piece of fabric is essential at the onset.
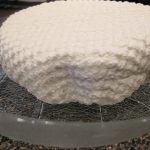
And here it is turned out onto a plate. I am absolutely thrilled every time I make this. It is time consuming, but so simple, and there is so much that can be made with it! It is so delicious and healthy and the satisfaction I feel when turning it onto the plate is as if I actually raised the cow, and milked her myself. Yes, the depth of my satisfaction is palpable, and a true testament to the intimate connection I have with preparing food with my hands for my family and those I love. As most of us are no longer in the position to produce our own food on the farm, there is so much more we can do, similar to this, to be an integral part of the food production process.
Marinated Yogurt Cheese Balls
Ingredients
- one batch of yogurt cheese made from 2 L whole milk
- 1/2 c of fruity extra virgin olive oil
- 3 large cloves garlic , finely minced
- 1 tablespoon dried oregano
- 1 tablespoon dried basil
- 1 1/2 teaspoon fennel seeds
- 1 1/2 teaspoon caraway seeds
- 3/4 teaspoon dried hot pepper flakes (to taste)
- 3/4 teaspoon cumin seeds
- 1 tablespoon Maldon Sea Salt
- more than a good few turns of fresh ground black pepper
Instructions
-
Using a melon ball scoop, or a mini-ice cream scooper, form small balls; place them into a small container
-
Drizzle balls with fruity extra virgin olive oil to be sure they don't stick to one another; continue drizzling as you add layers
-
Once all balls are made; combine remaining ingredients into second container of similar size
-
Slowly "roll" balls from one container to the other a few times to mix ingredients around them OR roll balls in spice mix and then preserve in oil; taste is similar, appearance is dramatically different
-
Serve with crackers
-
Will keep fully submerged in oil for a couple of months; almost forever, if balls are plain.
Recipe Notes
Do this according to your own palate. I have made this many times and usually to this standard.
These should keep at least a couple of weeks in a refrigerator. I find that my yogurt cheese keeps much longer than my homemade yogurt, so this should keep about three weeks, properly sealed.
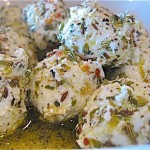
See these delectable little cheesy balls? They seemingly quiet, and unassuming, yet, they can be absolutely dynamic and pack a huge punch with properly seasoned.
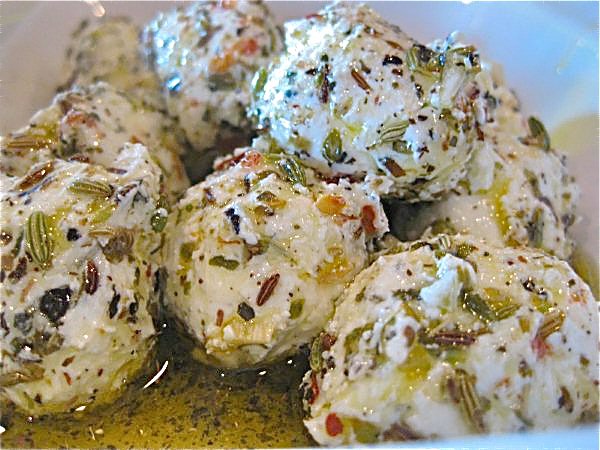
I could not resist getting a close up of the texture of this yogurt cheese. Is it not absolutely gorgeous: dense and creamy?
And here we are again, back to the final product. Something to smile about in a quiet moment, in a quiet corner, savoring a bit spread on a small cracker… that little sideways grin starting to pull at the corner of my mouth. Does it get any better than this?
Now, to view this experience on video, check out how I did it in “real time” here.
If you make these, let me know how it goes!






Thanks for your comment! It made me smile… Macarons take practice because it’s not about the recipe as it is about technique and knowing your ingredients and oven. Keep on trying. I love Alberta! My husband’s family is from Montana and we have visited Canada several times. Breathtaking!
Thank you Valerie. I have been using a lactose free milk so will have a try with that.
Hi Mary Kelly & Valerie,
I believe if you leave the yoghurt/cheese to ferment for much longer – between 20 and 24 hours, that gives the bacteria a chance to really build and they then break down the lactose and it’s much better for the gut …
I was listening to Dr. Allison Siebecker talking about it here: http://www.blogtalkradio.com/undergroundwellness/2012/03/15/ask-the-digestion-doc-with-dr-allison-siebecker
It takes quite a few minutes to get to her – so be prepared!
Hope that helps, Im going to try mine tonight …
Excellent resource, Lila!
Thank you!
🙂
Valerie
Hey Valerie,
I am making some yogurt right now with this recipe and can’t wait to try it! If we were to make a flavoured yogurt, say with frozen or fresh fruit/honey etc when and how would we add it into the mix?
Also, do you have a recipe for coconut yogurt? Would love to make a lactose free version.
Mel 🙂
Hi Mel!
I just came across this site. I do my fruits after the yogurt is done. I put the yogurt into 250ml canning jars 3/4 full and add berries fresh or frozen on top, and refrigerate. I have 12 jars, usually the yogurt is gone by the end of the week, so it keeps at least for a week… 😉
Great idea!
Thanks for chiming in, Joanna!
Sincerely,
Valerie
What is a “TM bowl” And what is a “thermomix machine” (just figured out that TM stands for thermomix, but I have no clue what that is).
Well, google it.
You will find a lot of information.
If you are interested in learning more, let me know and I will be happy to provide an online introduction to you if you are in Canada, or refer you to one of my many Thermomix Consulting friends and colleagues around the world.
🙂
Warmly,
Valerie
Hi Valerie.
Thank you for sharing both sesame seed crackers and the Yoghurt Cheese Balls.
Initially I was only setting out to make the sesame seed crackers as I want a healthier biscuit for my son who has Epilepsy, Global Developmental Delays and Dystonia. I am very focussed on providing as healthy and organic diet for him as I can to counter-balance his chemical medication.
Initially I was going to make flack seed crackers, however, a friend of mine suggested that sesame seeds are a healthier alternative. She advised me of your recipe, which got me rather excited.
I owned a TM5 from 2015 – 2020, however, I invested in the TM6 September 2020
Beautiful awesome machine she is, I call mine Thelma 🙂 I love her, she’s my personal chef 🙂
I use my girl to make everything, gone are the days where I buy sauce off the shelf, she introduced me to home-made bread, risotto, butter, she has opened my cooking world.
Since accessing your website, I have become interested in making your yoghurt cheesy balls as well.
I noticed that your machine is a TM31, am I able to use your ingredients and method in my TM6?
I look forward to hearing from you. Once again, thank you for the recipes
Hi Sonja, I’ve had a TM31, TM5, and definitely, now – a TM6. Recipes for all past Thermomix work with the TM6, no problem. I presented the Yogurt Cheeseballs at ThermoVention last year. They are definitely a hit! So lovely to hear from you and all the best to your cooking for your son and with him!
I assume you are in AU?
I am in Canada. Obviously! HAHAHA!
Let me know how it goes!
Valerie
Hi Valerie
I have just been introduced to your wonderful blog and have spent hours browsing through it while awaiting the arrival of my Thermomix. I want to make Yoghurt/yoghurt cheese and those yummy cheese balls. Trouble is I have Lactose and Fructose issues. I can buy lactose free milk and wondered if you have the recipe for using this.
Mary
Mary Kelly,
I am sorry, but I don’t have any experience with lactose free milk… if you mean soy milk – yes. I have worked with that, but making other things, not the yogurt. I would just give it a go and see what happens!
🙂
Valerie
This yogurt recipe works very well with soy milk. I just make sure there are minimal ingredients like soybeans and water.
Good to know, Joan!
Thanks so much!
Valerie