A great place to start; working toward Traditional Cheddar:Chapter Three,page 122, Artisan Cheese Making at Home
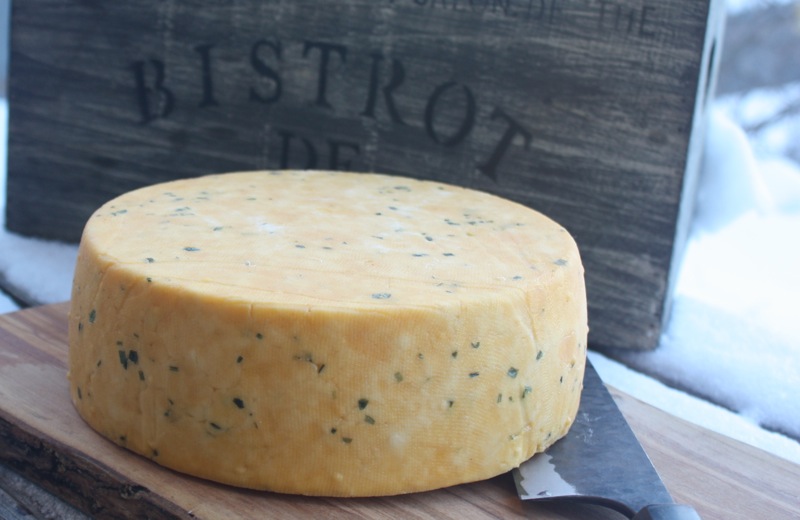
The blue winter day did not dampen my spirits! I have made Farmhouse Cheddar! The photo of this cheese on the cover of Mary Karlin’s book has enticed me since the moment I laid my eyes upon it! December is here. Winter is coming, the holiday season is in the air, and I have this gorgeous golden wheel of Farmhouse Chedder dotted with chives that will be aged to perfection just in time to adorn my festive cheese plate.
Making Caerphilly with Ian gave me the confidence to do this on my own. But, Deb and Addie came over and we each made one double batch of this recipe as well as the Traditional Mozzarella. What a great day! Firsts are poignant and Caerphilly was my first semi-firm cheese. I am still full of wonder and awe at my ability to create such milky magnificence. And now, this!
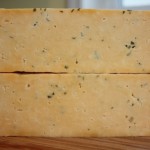
I haven’t tasted it yet. That is why the high pitched frenzy of delirium in soprano is missing from the melody of my words today. I insisted on cutting into it for the post, though it is only two weeks old and must age for one to two months. Ian suggested resealing it it a vacuum packed bag again, and that worked beautifully after this little peek-a-boo. You cannot even tell it is cut! I was surprised to see the little eyes in this cheese as I pressed it according to instructions, but I do like the look. The aroma? Mama Mia! Woops, wrong cheese country! The aromatic umami lift from the chives buried in the golden goodness was quite intoxicating. I can tell you from my nose, that this cheese would be delicious today. However, it will, apparently, be considerably better in four to six weeks. Did I say patience is not one of my virtues? I suppose the fact that I cut into it for a peek is evidence of that!
Cheddar cheese is a relatively hard, pale yellow to off-white sometimes sharp-tasting, cheese that originates in the English village of Cheddar in the region of Somerset. It is is the most popular cheese in the United Kingdom and Canada. Sadly, the name “Cheddar cheese” has no Protected Designation of Origin (PDO) within the European Union, but only Cheddar produced from local milk within four counties of South West England may use the name “West Country Farmhouse Cheddar.” I was surprised by this as I always thought a Farmhouse Cheddar was a faster and easier route to the “real deal” and this one certainly is, as the cheddaring process is not used in this cheese. Recall, it was not used in Mary Karlin’s Caerphilly recipe, either, but Ian did develop a recipe implementing the cheddaring process for the Caerphilly I made and I am so happy to have that knowledge and experience so that I can make other cheddars in the future.
Deb and I got organized while Addie ran back to the store to get annato and dried chives. We were not going to colour our cheese, but got talking and I wanted to. I had seen annato powder at our local Mexican store on Argyll Road, so off Addie went while Deb and I started our Traditional Mozzarellas. They were made on the stove in pots. The cheddars were made in the roasters. I had all ingredients prepped for both cheeses, and what did I do? After the culture went into the mozza and set, I stirred in the rennet and calcium chloride amounts for the cheddar. AH! Yup. Got mighty squeaky curds. Deb wasn’t so distracted, and her Traditional Mozzarella turned out as gorgeous as one would hope. So, that is, once again, still on my list. Above, the culture has set in the milk for a few minutes, then stirred in and is now sitting for 45 minutes.
Addie returned, and oh, my, did we have an experience with the annato powder. We had not purchased the liquid used to colour cheese from a cheese making company. I have a Thermomix, so I added water to the powder and made a fine paste. We were all very surprised to note that the annato had a very strong, unappealing bitter aroma. So, I added more water to the paste, milled it again, and then strained it through a very fine tami. That was the liquid we used. Sadly, not photos were taken during this intensely scientific problem solving episode; however, above is a photo of the left over paste to be used another time, if the flavour of our cheeses are not affected by the annato taste. Below, you will see that the curd has been cut. The annato was added when the calcium chloride and rennet were added. It is difficult to see any colour in the curd, below. We could determine a very light hue of yellow. The curds were resting, and as they rest, traditionally, the whey rises to the top of the vat.
I got a little ahead of myself at this point, and removed the whey to reveal the curd before stirring. Theoretically, the curds are to be stirred first, and then set to rest again. At that time, the whey is to be removed to reveal the curd. This “early” step didn’t seem to alter the process, but I will never know! However, you can now see the faint annato colour in the curd. I went a little crazy with the colour, according to Addie. I kept adding it until I liked the colour of my milk and believed, through the process, I would get the colour I actually did get. No regrets! (I haven’t tasted it yet, but there is no annato aroma.)
This is the moment where the curds reveal their nature to the cheese maker. Look at those pillars of gelatinous genius. Even though Ian was not there, I could hear his mentoring praise: “Fantastic curd, Valerie!” And, Addie chimed in and echoed that thought, “That is beautiful curd!” And it was truly the firm, clean cut and texture I was hoping for.
After stirring it slowly and carefully for awhile, the curds started to stick together, which is really what you want for this cheese. See the imprint of the inside of the spoon on the curds below?
The curds are to rest and the whey will once again rise above them; after this time the whey was to be removed to reveal the curd.
The curds are plump and clumping after this rest. The clumping is particularly evident in the second photo, below.
Deb had a difficult time maintaining the temperature of her vat and her curds shattered. However, she did end up with a gorgeous cheese in the end, very much like Addie did when making Caerphilly when his curd shattered. Below, Addie is as delighted with his curd as I was with mine. Interestingly, it looks like there is annato colouring in the whey, but this is just the lighting of the photograph. We all noted that the annato colouring clung to the milky curd and the whey remained the same green yellow clarity that it usually is.
I removed more whey and have, below, completed the second stirring, maintaining the temperature of 104ºF. There is an error in Mary Karlin’s book, so I am going to print the recipe for this cheese below. Usually, we do not do this out of courtesy for Mary’s authoring of her book, but to ensure that everyone in the project gets the correct recipe, I have decided that this one will be included, below. The curd does look just like peanuts in their shell, as Mary describes them. Or, I like to describe them as popcorn!
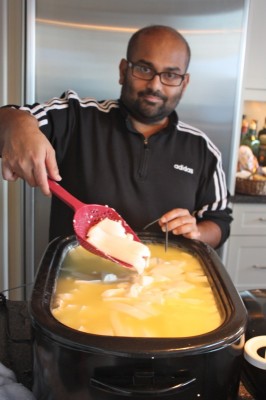
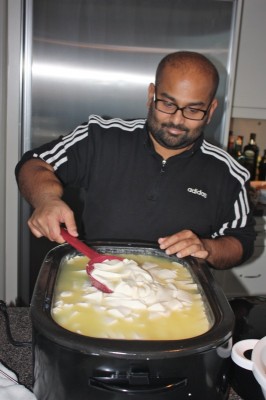
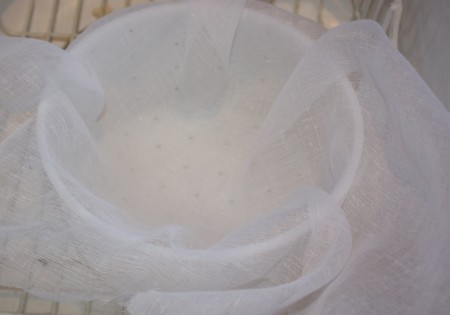
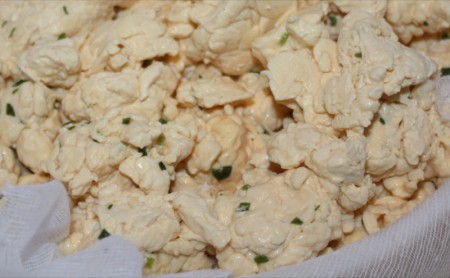
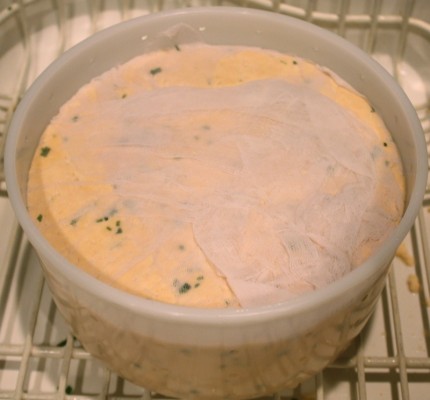
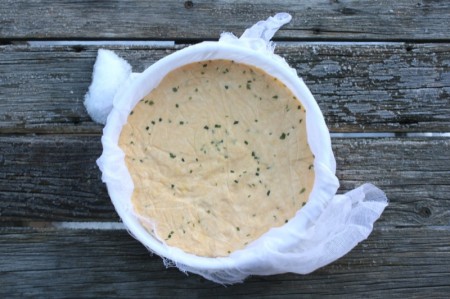
It was very easy to gently ladle out the curd into the waiting sieve. You can see I neglected to wet the cloth. Once all of the curds are in the sieve, the chives and salt are tossed in. I did not add them all at once, instead, I added, tossed, added, and tossed to try to evenly distribute both. The mould was ready and the flavoured curd was transferred to the mould, the cheesecloth was maneuvered to leave as few imprints as possible, then folded over the top of the cheese, topped with the follower. The cheese was pressed for an hour, unwrapped, turned and placed back in the mould to be pressed again for the required amount of time.
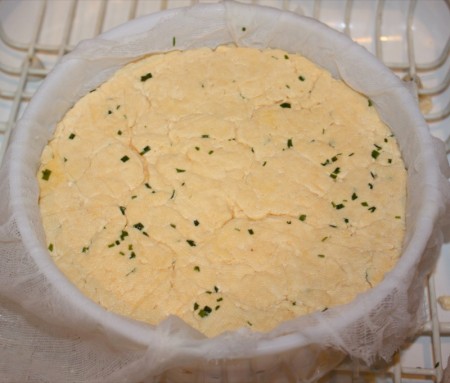
The cheese was more like the colour on the right, above. The left side is wrapped an looks much more orange than it was at this phase. Above, right, is the appearance of the cheese after pressing for one hour. Below, the cheese will be unwrapped, then brined, after the 12 hour press.
I was tickled with the aroma and texture of the wheel fresh out of the mould! The colour was a lovely orange, and so close to exactly what I was looking for. The outdoor light has lightened the colour in the photos.
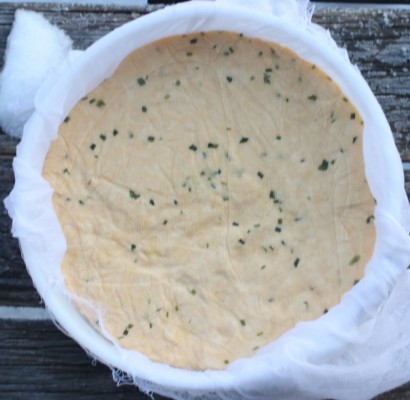
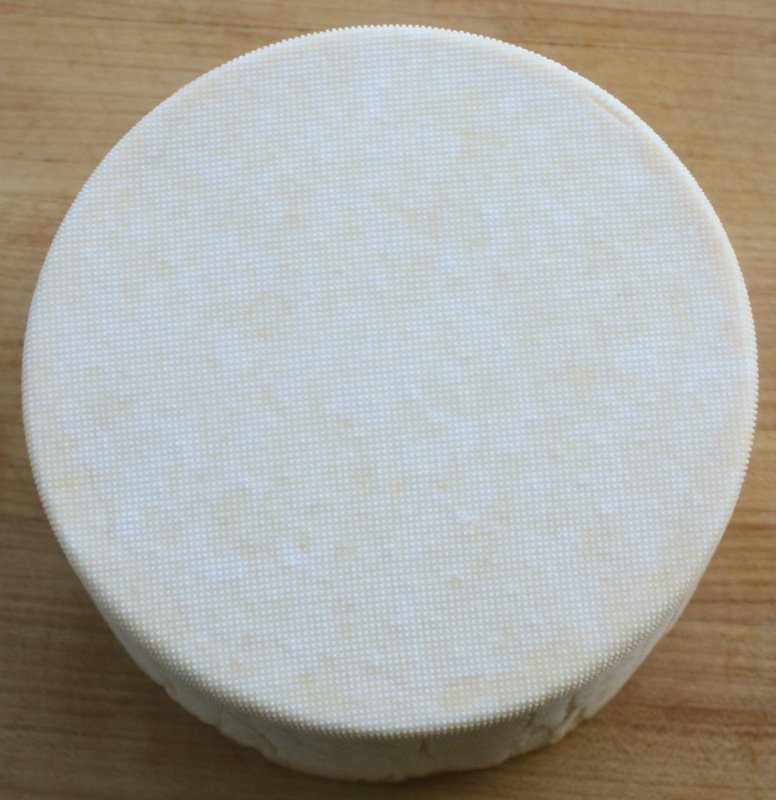
Into the brine my wheel went, and now for the pleasure of unwrapping Addie’s! That is the delight of cheese sitting! Look at the gorgeous texture of his cheese surface. It is different as he used the artificial cheese cloth and I really like the texture imprint it left! Addie added much less annato than I, yet his cheese has a lovely golden tone; the photo below is an accurate depiction of the colour of his cheese. Following it, you will see the delicate surface texture left by this cloth.
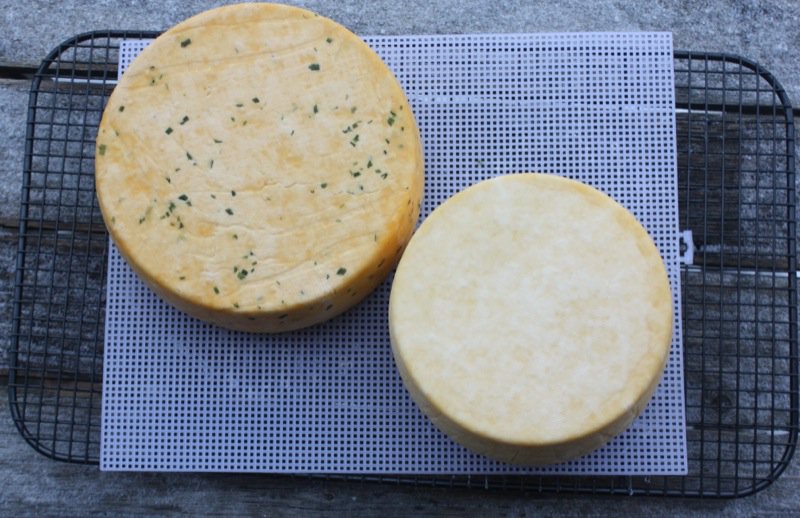
Turning both discs over for a family photo fresh out of the brine, you can now see the difference in the colour, even under the blue light of this Winter morning. Addie used one of my moulds that didn’t have a follower, but we found another mould that fit well inside of it. I was responsible for ensuring that the press was even, and I cannot tell you how many times I heard the books fall off of each of ours and went to reset them both. Sadly, it is his, this time, that is a little “out”, yet Ian would say, and I definitely agree, that this gives the cheese an authentic artisanal look. I see Addie’s cheese as stunning.
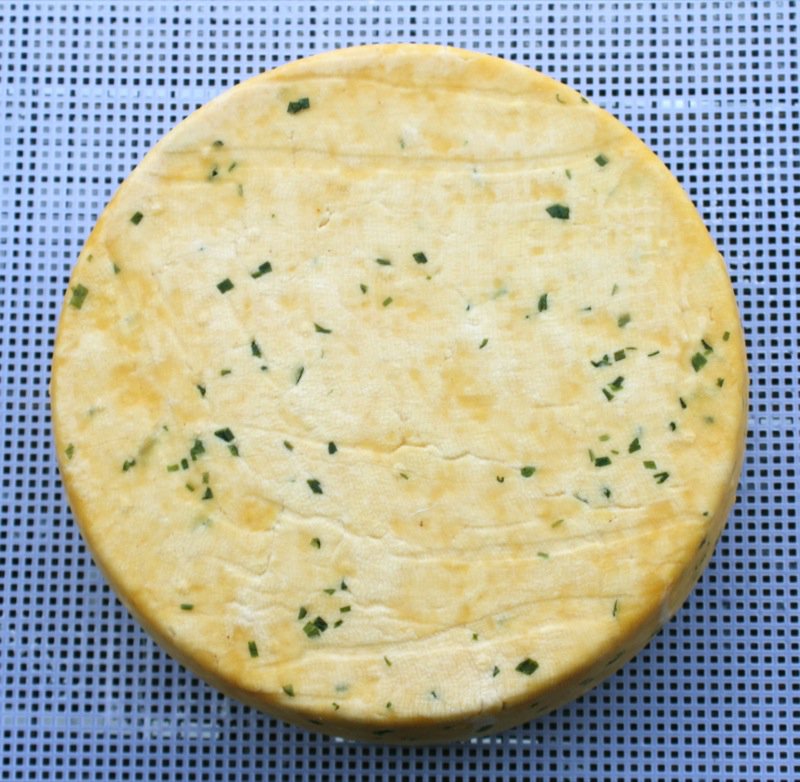
For presentation purposes, we each have our good side! I am so happy I added extra annato and the chives. As soon as I added the chives, I regretted it. The smell was very off putting and we all thought it was a mistake. Oh, well. That is why neither Deb nor Addie added any to theirs, and if they had done it first, I surely would not have added chives to mine. Aging, even this short little while, has changed my mind on that! (I still have to taste the cheese to be happy with the amount of annato, but I do love the look!)
The cheeses must air dry now, before waxing. I have shared Ian’s words to me about air drying cheese with the recipe, below. To note, the time given in every recipe is only a guide. It is most important to have the rind properly dried before waxing.
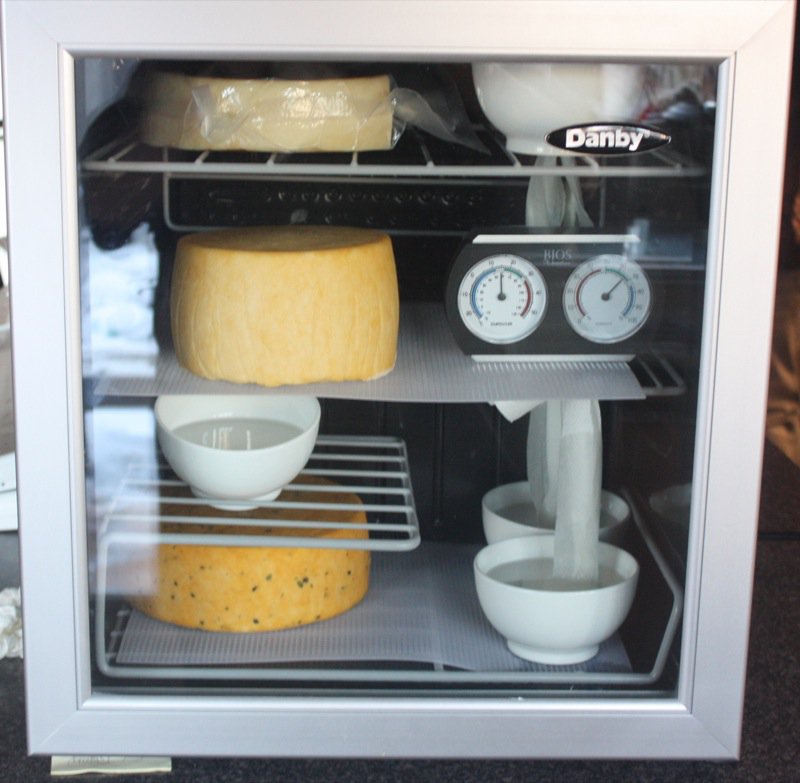
Mary offers alternatives to waxing, but after talking to Ian, waxing it was. However, I hadn’t any wax. I made arrangements to get some, but had to wait a couple of days after the three day air drying process at my house, so Ian suggested putting it in the cave at 10°C and at 90% humidity in the interim. You will see the dished of water and paper towel wicks I rigged up to get my cave to the correct humidity. It worked, as my rind didn’t crack and was a very nice texture on waxing day.
Took a few photos before picking up the wax, and then found out that I wasn’t going to get any wax. Yikes! What can I do. It seemed logical to vacuum pack it, as that would surely act as a wax. Ian agreed that it was a possible solution, so that is what I did.
Just before publishing this post, I cut open the vacuum pack to reveal the cheese for a photo shoot. I will add a sliced piece to the post after it has cured long enough. Below, you will see the cheese at two weeks, bravely sliced in half before its time.
I did not taste it. My desire to mess with it as little as possible was surprisingly greater than my desire to taste it. The aroma was so satisfying and holds so much promise, that I can wait. Just looking at the photo above gives me so much pleasure! I cannot wait to see how many of our Cheesepalooza participants make this cheese!
Mary Karlin’s Farmhouse Cheddar Doubled
Ingredients:
- 16 litres pasteurized whole cow’s milk
- 1 teaspoon Meso II powdered Mesophyllic starter culture
- 1/2 teaspoon liquid annato diluted in 1/4 cup cool distilled water ( I used abut 2 tablespoons of my homemade liquid)
- 1 teaspoon calcium chloride diluted in 1/4 cup cool distilled water
- 1 teaspoon double strength liquid rennet diluted in 1/4 cup cool distilled water
- Kosher salt (Diamond Crystal or cheese salt)
- 4 teaspoons dried chives
- 8 inch tomme mould
Instructions:
- Read all instructions carefully, disinfect cheese making supplies and area and get all ingredients in place
- Heat milk in non-reactive 16 litre vat or stock pot (I use my turkey roaster, with water as a double boiler) set over low heat
- Bring the milk to 86°F over 10 minutes, no faster (slower is fine); turn off the heat
- Sprinkle starter over milk and rehydrate for 5 minutes
- Mix well using a whisk or slotted cheese spoon for one minute using an up and down motion for 20 times; cover and ripen for one hour, maintaining temperature
- Add the annato, using a whisk or slotted cheese spoon for one minute with an up and down motion for 20 times to incorporate
- Add the calcium chloride using a whisk or slotted cheese spoon for one minute with an up and down motion for 20 times to incorporate
- Add the rennet using a whisk or slotted cheese spoon for one minute with an up and down motion for 20 times to incorporate
- Cover and let sit, maintaining 86°F for 30 to 45 minutes, until the curds offer a clean break
- Maintaining 86°F, cut the curds into 1/2 inch cubes; rest fo 5 minutes
- Over low heat, slowly bring the curds to 104°F ove a 40 minute period…slowly, slowly
- Turn off the heat, maintain the temperature and gently stir the curds for 20 minutes, or until they start to firm up
- Maintaining 104°F, let the curds rest undisturbed for 30 minutes; they will sink to the bottom
- Ladle off enough whey to expose the top of the curds, then stir continuously, still at 104°F, for 15 to 20 minutes until the curds are matted and cling together when pressed in your hand
- Line a strainer with a damp butter muslin; ladle the curds into it
- Drain for 5 minutes, then toss in the chives and salt, mixing thoroughly with your hands (I did this in 3 to 4 increments)
- Line an 8 inch tomme mould with damp cheesecloth; gently transfer drained curds into lined mould
- Pull up cloth to smooth out wrinkles, cover the curds with the cloth tails, set the follower on top and press at 8 pounds for one hour
- Remove the cheese from the mould, unwrap, flip, and redress, pressing at 10 pounds for 12 hours
- Make 4 quarts of near saturated bring (see page 24 of her book) and chill to between 50°F or 55°F
- Remove the cheese from the mould and cheesecloth and soak in the brine for 8 hours, turning once
- Remove from brine; pat dry and air dry on a mat at room temperature for about 24 hours or until the surface is dry to touch (see notes below)
- Rub off any mold spots that may have developed with a solution of salt and distilled vinegar
- Wax the cheese (see page 28) and age at 50°F (10°C) and 80 to 85% humidity for one to 2 months, flipping the cheese once a week for even ripening
Note: I vacuum packed my cheese a week after making it: air drying and then cave curing
Ian’s wisdom about air drying cheese:
- Don’t always trust the time allotted in the recipe as there are many factors that can influence Air Drying time. Humidity in your house and the pressing/draining time can influence how much whey seeps out. One sure way is the hand test: is it dry? Another test is to put the cheese on a wooden cutting board for a few hours. When you pick it up, is there a ring or wet mark? If so, give it another day and check again.
- Make absolutely sure that you cheese is dry before doing any waxing/bandaging/larding. If not ,you will have a nasty mess on your hands. I waxed a cheddar after the prescribed 2 days of drying; it felt dry to touch, but it really wasn’t. After waxing, it continued to leak whey and was a nasty mouldy mess.
- One note on waxing: use proper cheese wax, it is specially formulated to coat cheese and will not stick to it when you age it (it will stick a bit, but not as much as other types).
The whole purpose of the Air Drying phase (done outside the cave at room temperature) is to help the rind develop; if you get a nice rind, you could choose to do a natural rind and it is pretty much bullet proof. The salt from the brine will add salt to the cheese, but it will help the rind too. Once in the cave you will need to keep an RH of 80-85 %. If you are going to wax, you will need the same humidity level. For bandaging, you will want lower humidity, but I would not go below 75%. If you have humidity issues, you can use a ripening box (just a container with a lid). When you decide if you are going to wax, put your cheese in the regular fridge for about an hour to chill it. The wax will stick better.
Ripening Box: Put the cheese on a plastic mat or use chop sticks in the container and put a damp paper towel scrunched up in one of the corners and put the lid on slightly ajar to allow air flow. Wipe the lid off at least once a day to remove excess moisture.


















Valerie, it looks amazing! I can’t wait to try this one! I’ve just got to try and source some annato as I like the fact that this is a different colour! I’m impressed you resisted trying it, I always have a sneaky taste before waxing a cheese!
That farmhouse cheddar looks so beautiful!! I’m so glad that you decided to add the annato, despite the adventure that it turned into. I too would have “gone crazy” and added that much. I can’t wait to hear how it tastes.
I don’t think I could have resisted tasting it! It looks beautiful and delicious. Your are so lucky to have an adventurous group of friends with which to share your cheese making endeavors, Valerie!
You are incredible! The farmhouse cheddar looks so good!!
Your cheddar is beautiful!
Good job! Farmhouse cheddar was actually the first “serious” pressed cheese I made. I was so scared, I used only one gallon of milk. I was so thrilled when I tasted it. I like the addition of chives. I have never used annatto, though a while ago I bought some in seed form. Thanks for the notes about turning it into something to add to cheese.
Valerie you farmhouse cheddar looks amazing. I would so love to taste it. The curds look amazing to. You are so well set up.
Evelyne,
Having the turkey roaster from several years ago certainly had me set up, and I didn’t even know it!
The only purchase I have made that was major – well, two: the 50 dollar thermometer, which I would highly recommend, and the really cheap wine fridge (available just under 100 on sale days). That is an investment that I looked at as paying for a course in cheese making. I have been learning so much under Ian’s tutelage and within the Cheesepalooza collaboration for free, so that is how I justified the expense of the wine fridge.
🙂
V
I just happened upon your site and I’m loving it. I love the idea of cheese making, and have only made cream cheese. I have a turkey roaster collecting dust in the basement. Maybe it’s time to take it out!
Yes! It’s fun to do it with someone, Betsy!
If you are a local Edmonton gal, Ian Truer from Winding Road Cheese was the brains of our group and now working full time in the business. I no longer make cheese at home – for now. I mever say never to anything as I am constantly making fresh cheeses and loved the entire project.
Sincerely,
Valerie