This is a personal triumph with a Thank You to Deb!

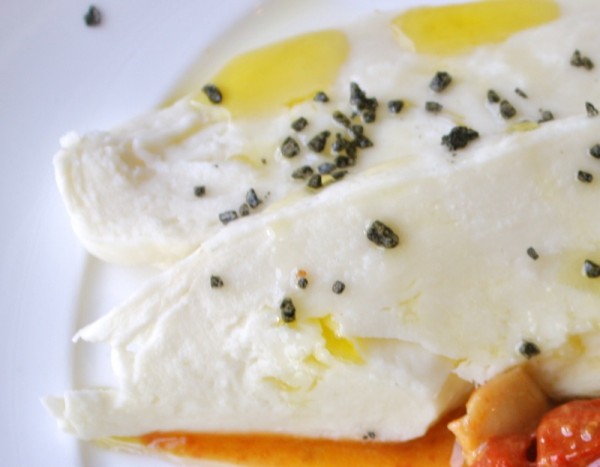
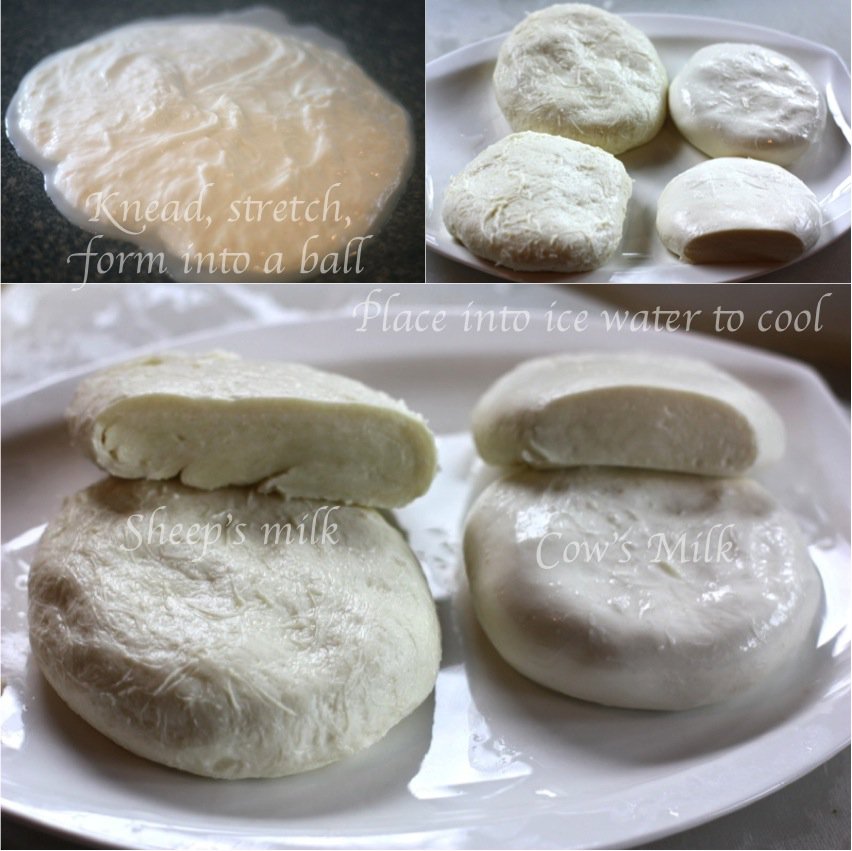
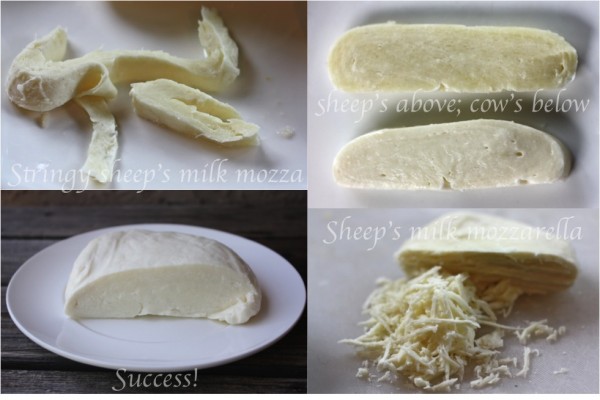
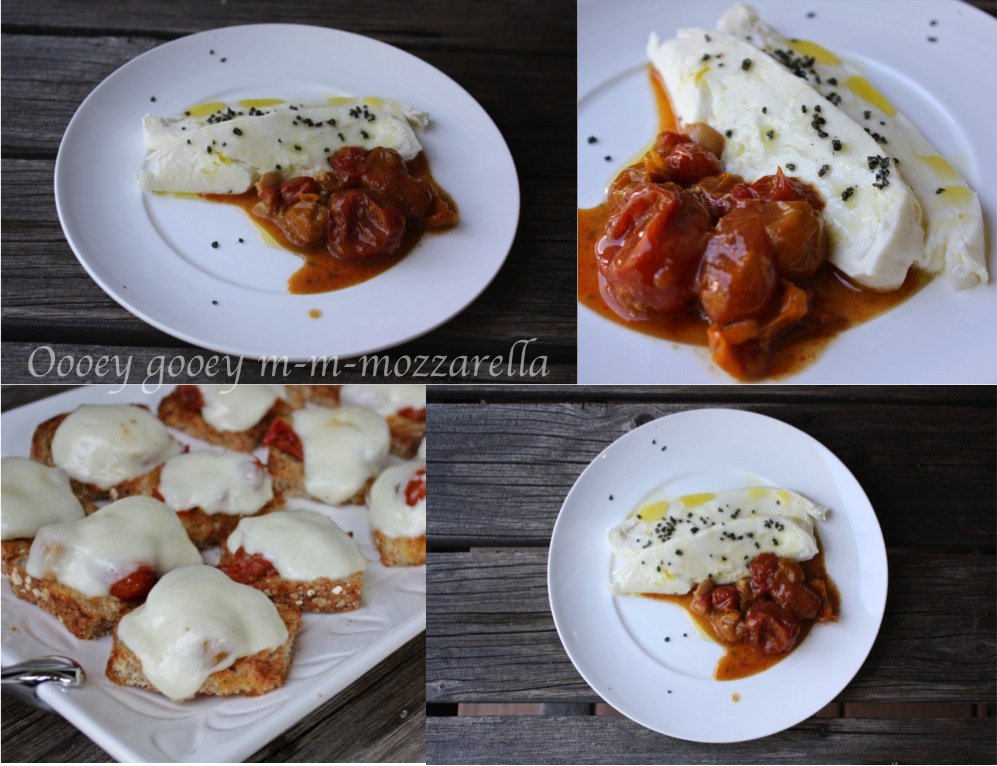
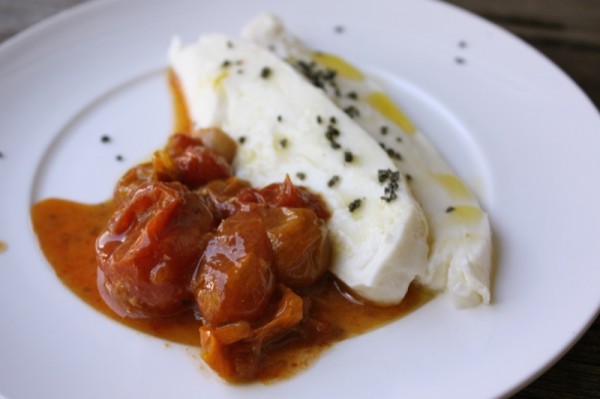
When Deb came over to teach me how to make mozzarella, I had purchased Sheep’s milk completely by accident. I used it anyway. It didn’t work well, but as she made her cow milk mozzarella right beside me, it was a profound learning experience. And, I practiced. It took me only two more times until I got a really good mozzarella that I liked. A lot. And then I made it two more times. I have done all of this in June. Look at the soft milky texture above. It as so different than the hard, stringy, good for grating only sheep’s milk mozzarella that was my first attempt. But, I did use it! Nothing went to waste.
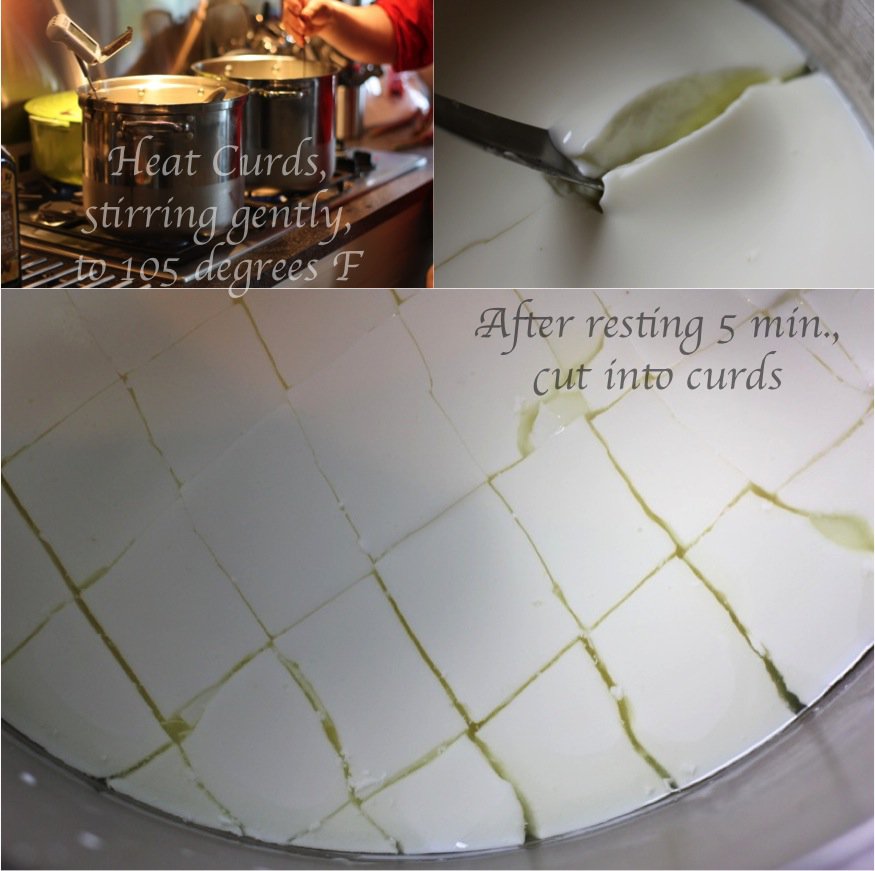
The Vital Greens milk has such a beautiful milky flavour that I hadn’t realized how much the industrialized milk has lost that beautiful farm fresh milk flavour I learned to love as a child. And, I am not afraid. For me, the biggest lesson I learned was to keep the curds as big as possible during the curd cooking process. I like a soft mozzarella, so I work to very gently stir the curds as I heat them in the whey to 105°F. That seems to make all of the difference for me.
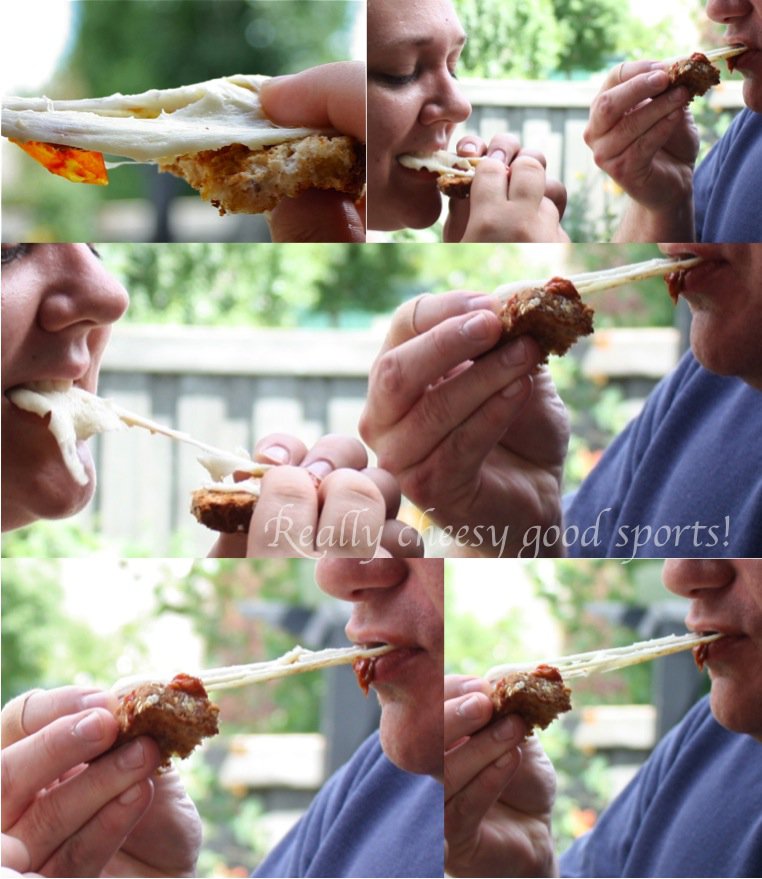
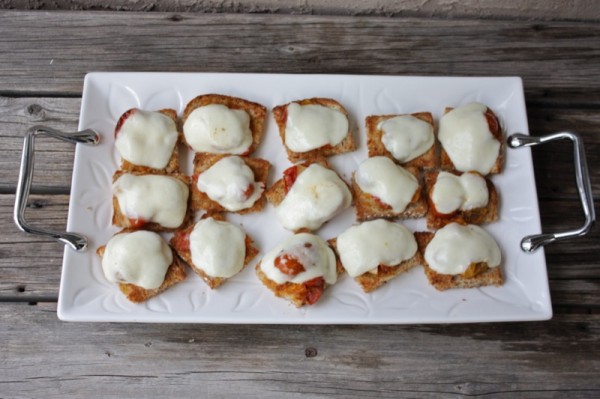
Ian and Deb were coming over for our initial Cheezepalooza meeting, so I had to make a cheesy snack! Are they not great sports to pose as my “isn’t this incredibly stretchy mozza?” models, below? I served my Oven Roasted Tomatoes under the cheese as I knew it would be delicious. I save this for all great food lovers who visit, as my most loyal readers know.
60 Minute Microwave Mozzarella
Best made with pasteurised 2% Vital Greens milk (not ultra pasteurized) at first, and then work toward using whole milk or raw milk, if you are so fortunate
Kitchen Tools:
- 6-8 litre stainless steel pot
- large slotted spoon
- colander or seive
- 2 litre microwave safe bowl
- measuring spoons
- precise digital thermometer from 80 to 120 degrees F
Prepare Work Area:
- sanitize all surfaces, pots and utensils
- have counter and stove top free of food
- get out clean cloths (all dirty ones away)
Ingredients:
- 4 litres 2 % Vital Greens (local farm) milk
- 1 cup cool water
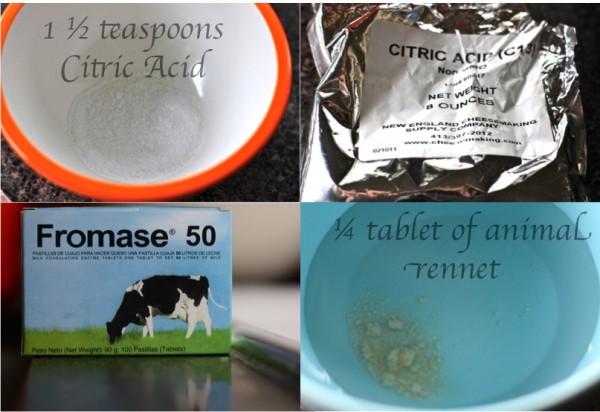
- 1 1/2teaspoon of citric acid
- 1/4cup cook water
- 1/4rennet tablet or 1/4tsp liquid rennet (1/8 th teaspoon if using the liquid rennet from Bosch Kitchen Centre in Edmonton)
Instructions:
- Crush 1/4 tablet of rennet and dissolve in ¼ cup of cool, unchlorinated water; set aside
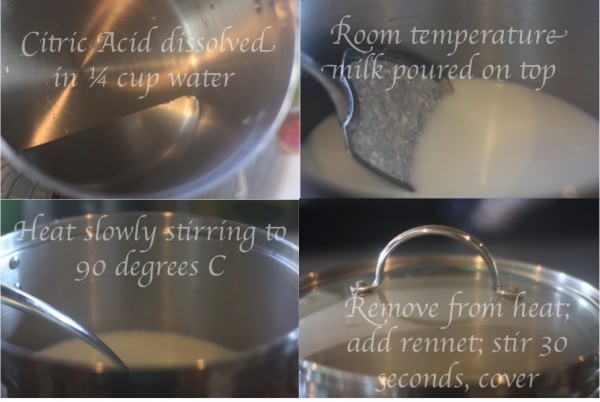
- Add 1½ tsp. citric acid to 1 cup cool unchlorinated water
- Add the citric acid solution to the empty cold pot
- Pour cold milk into your pot quite quickly to mix well with the citric acid; this will bring the milk to the proper acidity to stretch well later (IMPT)
- Heat this milk to 90°F, stirring constantly: the longer it takes to reach the 90F, the better the quality of the cheese (IMPT)
- Remove the pot from the burner, and slowly add your rennet (which you prepared in previous step) to the milk (IMPT) immediately stirring in a top to bottom motion for approx. 30 seconds, then stop
- Cover the pot, and leave undisturbed for 5 minutes
- Check the curd: t will look like custard, with a clear separation between the curds and whey around the side of the pot (if too soft or the whey is milky, let set for a few more minutes)
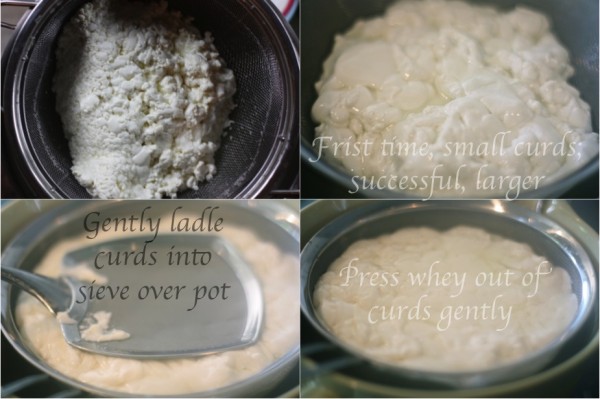
- Cut the curds into a 1″ checkerboard pattern with a butter knife reaching all the way to the bottom of the pan
- Place the pot back on the stove and heat to 105F, stirring the curds slowly with your ladle and keeping them separate; work to not break them down
- Take off the burner and continue slowly stirring for 2-5 minutes: more time will make a firmer cheese
- Scoop or gently pour curds into a sieve, pushing out the whey, gently
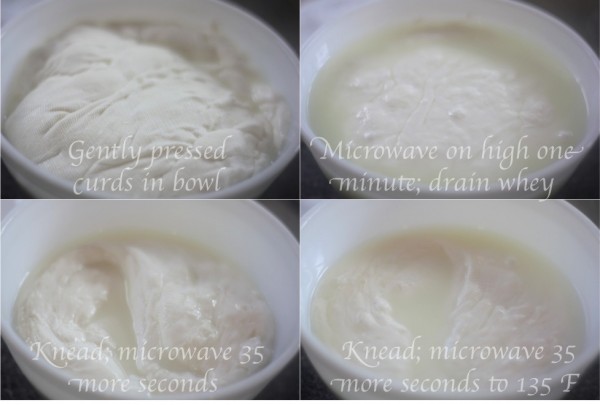
- Transfer the cheese into a microwave safe bowl (if the curd is too soft at this point let sit for another minute or so)
- Press this curd gently with your hand, pouring off as much whey as possible. (reserve this whey to use in cooking)
- Microwave the curd on HI for 1 minute
- Drain off all whey
- Quickly work the cheese with a spoon or your hands until it is cool enough to touch (rubber gloves will help since the cheese is almost too hot to touch at this point)
- Microwave 2 more times for 35 seconds each, and repeat the kneading as in the last step
- Drain off all of the whey as you go
- Knead quickly now as you would bread dough until it is smooth and shiny
- Add salt
- The cheese should be soft and pliable enough to stretch like taffy
- Form it into a ball and drop into ice water to cool and refrigerate wrapped in plastic
- Best the same day as made
Note after #5:
- as you approach 90°F, you may notice your milk beginning to curdle slightly due to acidity and temperature
CHEESEPALOOZA
Which brings me to our announcement: Cheesepalooza is starting AUGUST 1.
I have spoken to Mary Karlin of Artisan Cheese Making at Home and though she is not sure, at present, how much time she can devote to our project, she will contribute her mentorship to it in a yet to be determined capacity. Project?
Yes, Addie, Ian, Deb and I are initiating a Cheesepalooza Project: a 12 month Artisan Cheese making adventure where we use Mary’s book as our guide and all make the same cheeses to a specific schedule. We hope many of our readers will participate. There will be monthly postings. The draft plan is here and the link for you to submit your name to participate is on the same page.. Then comes the prizes and sponsorships, we hope!
First, we need to get a good group of people; numbers do matter to sponsors.
Please let everyone you know! Tweet it and invite your blogging community. I will e-mail you with the deets as soon as we have more!
Please also tell us what you are interested in learning and doing, cheese-wise! If you have any cheese making expertise, please also let us know!
We are excited! And look at me! I have overcome my fear, and am diving in headfirst, but holding more than a few helpful hands along the way!



I really need to try my hand at some cheese-making! Your mozzarella looks fabulous!
Your Mozz turned out gorgeously! Congratulations on a beautiful cheese!
I see that you re still learning and discovering. Making mozzarella is truly an art.
Your cheese came out stunning, congrats! Heading over to check out the participation requirements, would love to do this with my daughter. thanks for the invite!
Vianney
This would be great family fun – we are doing only ONE a month… so, not too much. Hope to hear from you!
🙂
Valerie
I love making mozzarella – but haven’t done in ages. I should definitely do it again.
Kate – if you CAN do it, why haven’t you? That is the question.
🙂
Valerie
Beautiful mozzarella. Val! I wish this was our first challenge! That said, I’m so glad you joined DB! you’re going to kick booty in the challenges! Just saw this month’s challenge – how perfect is it for you with all the cheese you’re making? lol No wonder you love it 😀
I am a cheese making virgin! But I’m so excited to be taking part in #cheesepolooza. Hopefully, it’ll make for some interesting blogg posts 🙂
We are also excited to have you join us Eunice!
🙂
Valerie
What could be more delicious than freshly made mozzarella! Yours turned out great!
This post makes me very excited to get going on the Cheesepalooza challenges! Your mozza looks amazing. Love new kitchen experiences
G’day! I have done cheese making before, true!
As a very new owner re TMX, I am soooooooooooooooo excited to try your recipe! Thanks for inspiring me and spurring me on today too!
Cheers! Joanne
Looks WONDERFUL!
Hey, Joanne!
Love my Thermomix, too!
But I usually don’t make my mozza in my machine – I do make Whole Milk Ricotta and Mascarpone and Homemade Butter and Homemade Yogurt – each and all – in the Thermomix!
🙂
Valerie
Fast forward 2918: how would you make this with Thermomjx?
Hi Maureen,
The Thermomix doesn’t heat to 90 degrees slowly enough. The advantage of the Thermomix is hands off – a second set of hands, but to use it to make this, you would have to be there the entire time, upping the heat – 50 C then 60 c then 70 c then 80 c to 90 c- carefully getting it to 90 C over about 30 minutes… so best to just do it in the pot. Make sense? Plus, it has to be still – not turned – with heat maintained when curding – and this cannot be done int he machine.
🙂
V