At home with my Brioche Lesson from Le Cordon Bleu in Paris
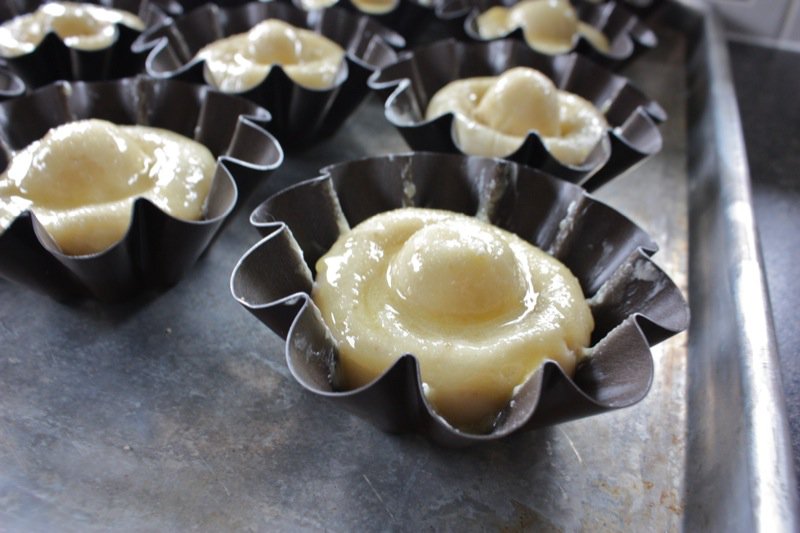
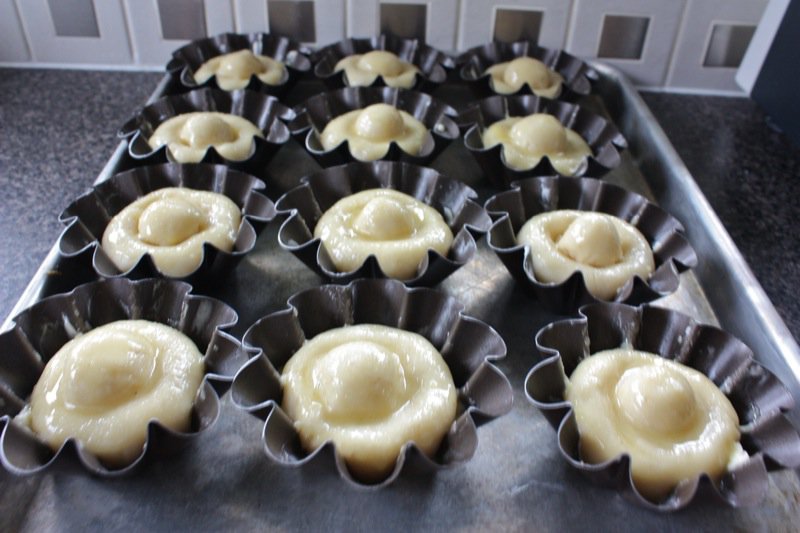
Everything in the TM bowl, the dough was fantastic to work with; the hardest part was ensuring the little head on top was done properly and would sit straight up. No guarantees… they are all in my little pans purchased from Dehillerin in Paris. Rising, for the second time, in their cute little shapes. and voilà ! They still look perfect and are ready for the oven!
 But I know better. They all looked this perfect in Paris, this past summer, at my bread making Atellier at Le Cordon Bleu. Yet, only the teacher’s came out of the oven “with its head on straight”!
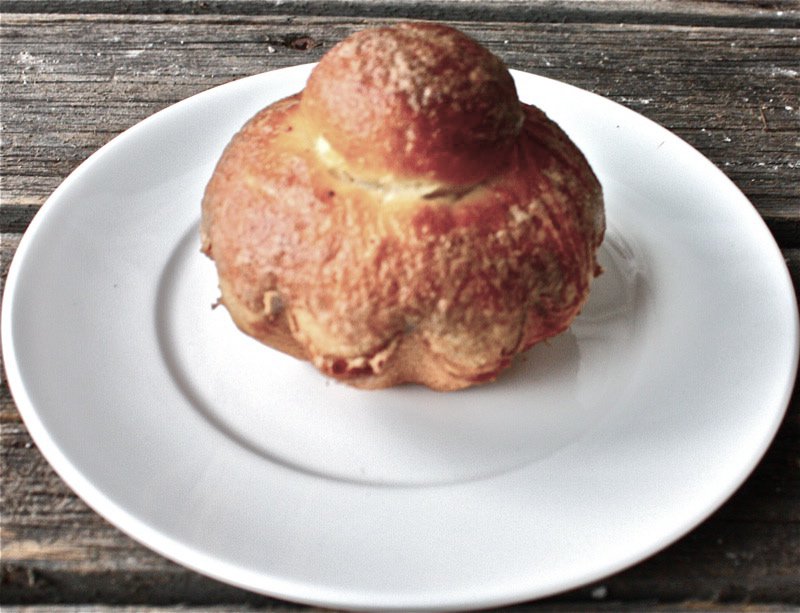
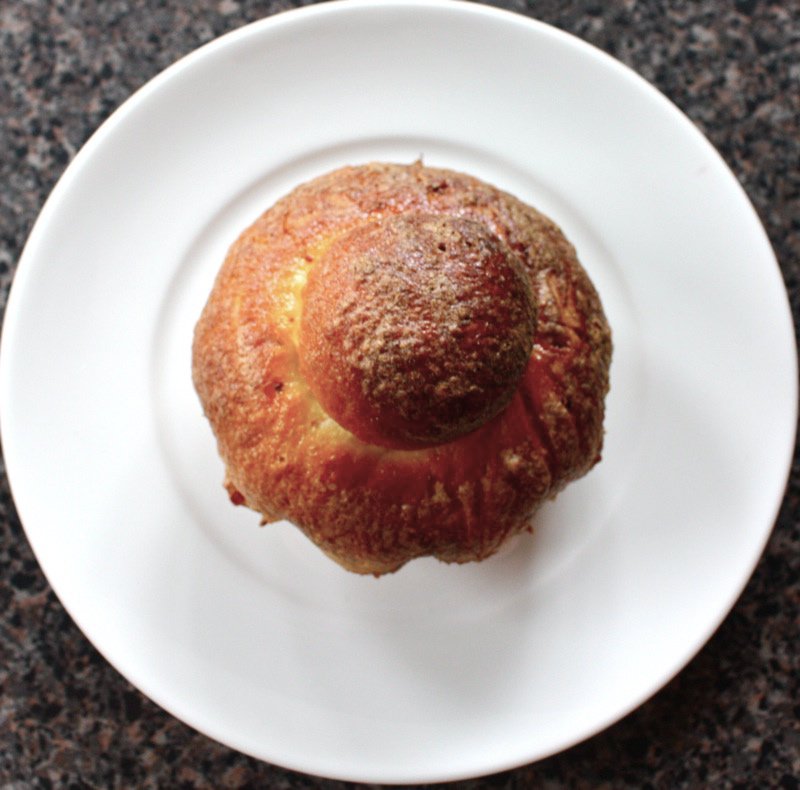
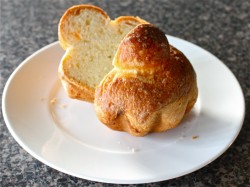
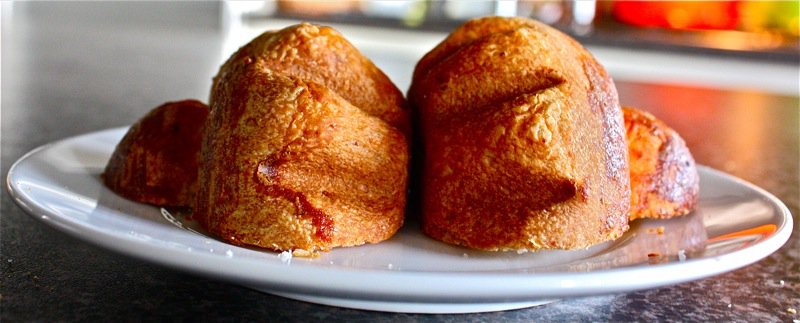
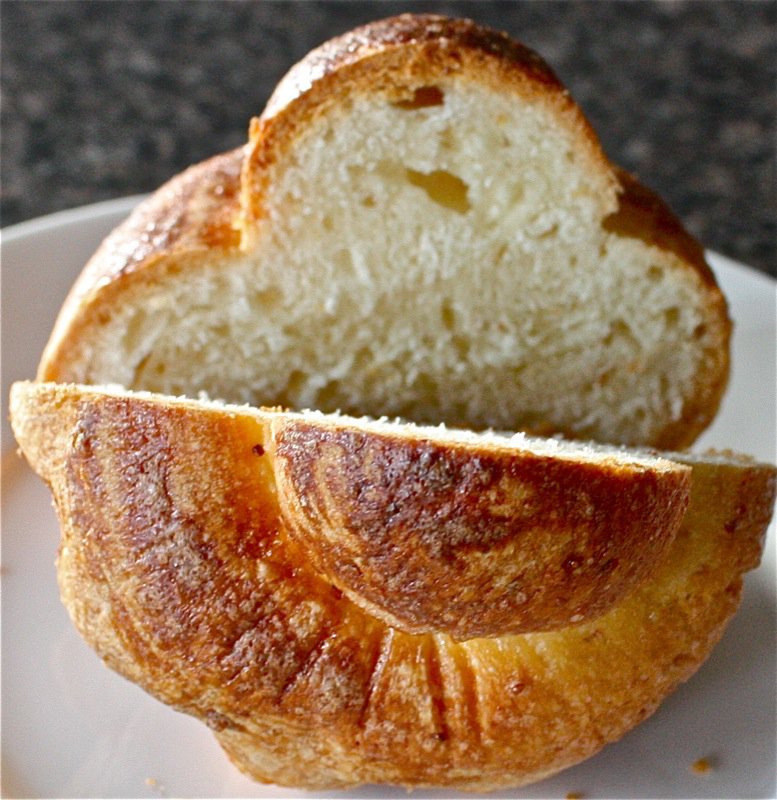
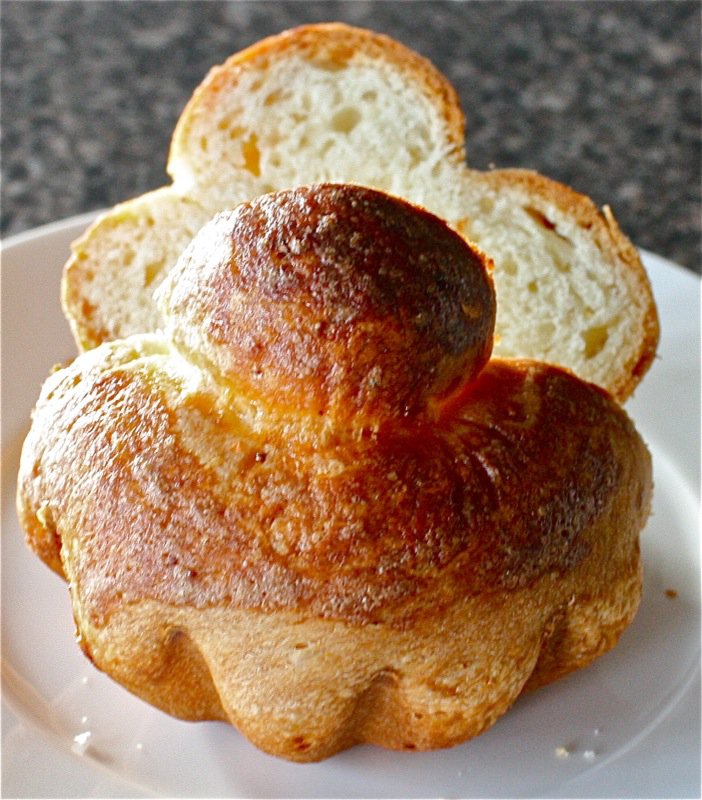
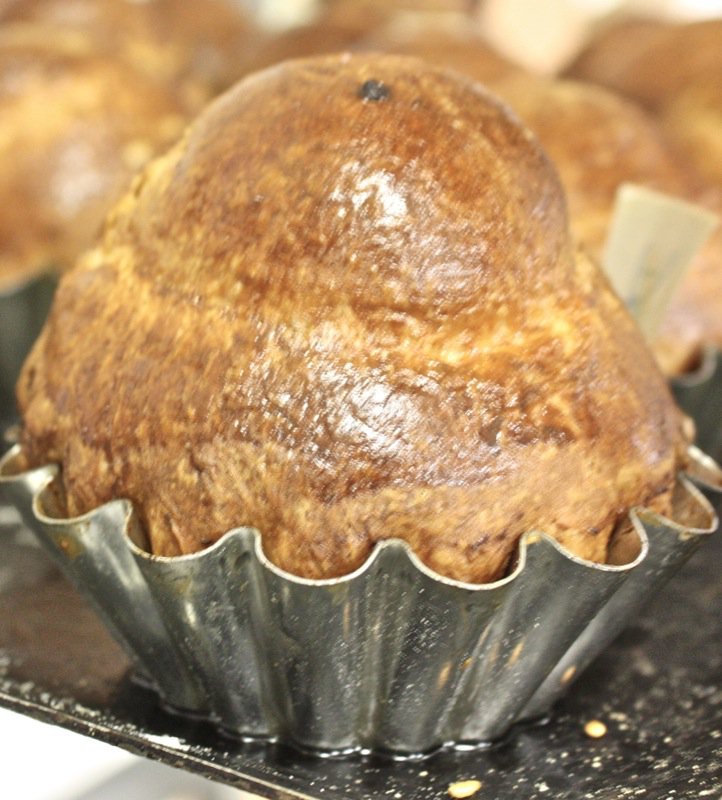
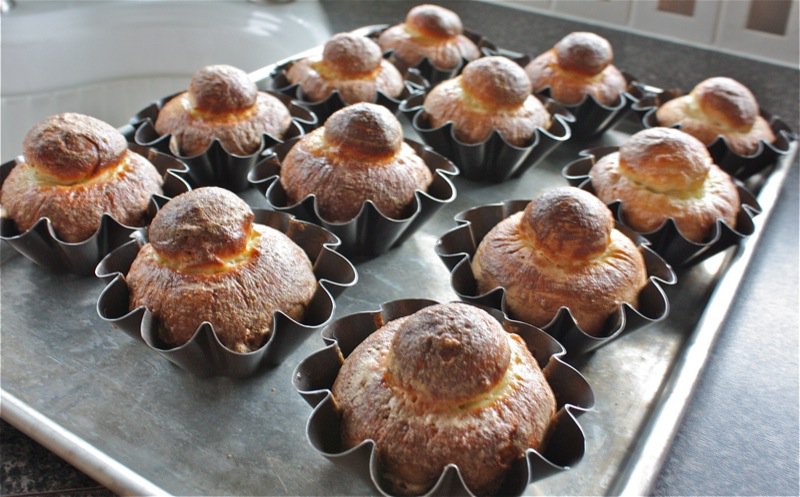
I held my breath, and every one of mine was manifique! I was overjoyed. Look at that colour!
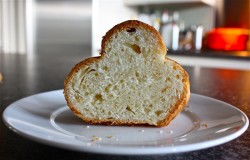
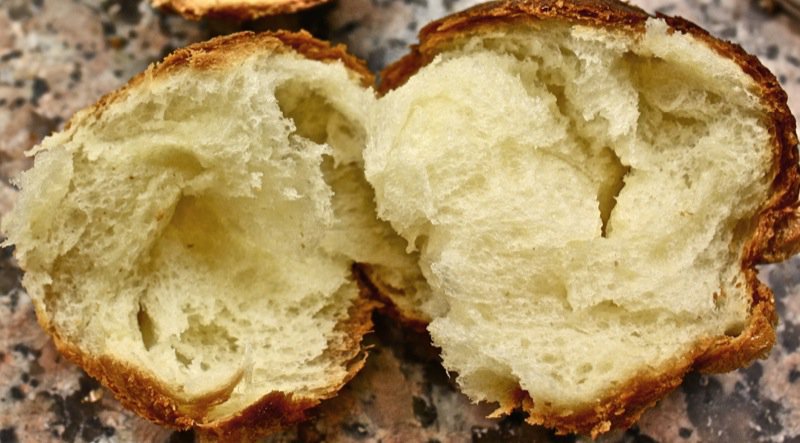
Pretty good crumb, too.
So, let’s revisit my lesson at Le Cordon Bleu in July of 2010. Chef Walters had saved some dough from a previous class and had it brought out of the fridge at the end of the day when we were asking questions. We were small and efficient class, so had some extra time. Lucky us!
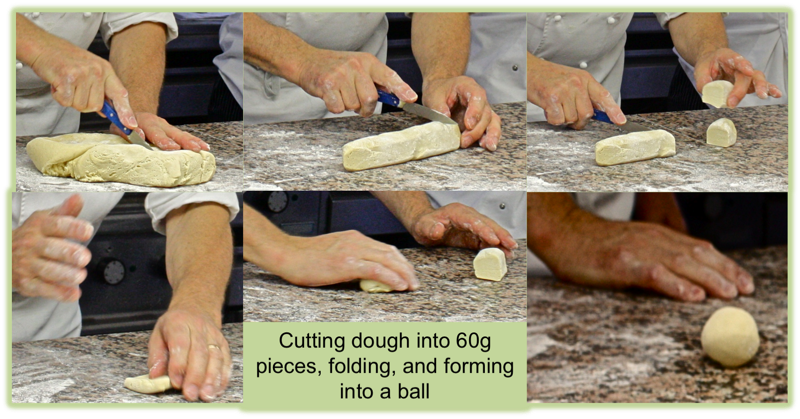
He started to work the dough, but it was too cold, so he just cut it into individual portions. Most only took one. Everyone was offered more. I took three.
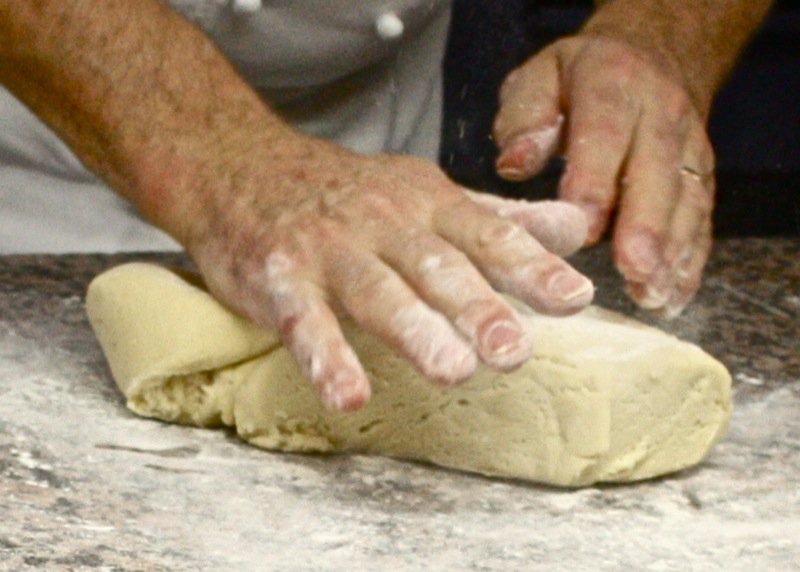
He had us warm the dough in our hand and go through the (by now memorized) way to fold the dough like an envelope after flattening it; then roll it into a ball with your hand cupped. Now, the tricky part: making the adorable little head. At this class, so few were successful, as you will see. Thus, my proud smile and wagging tail at the beginning of this post when I so proudly presenting my own homemade brioche: head standing tall!
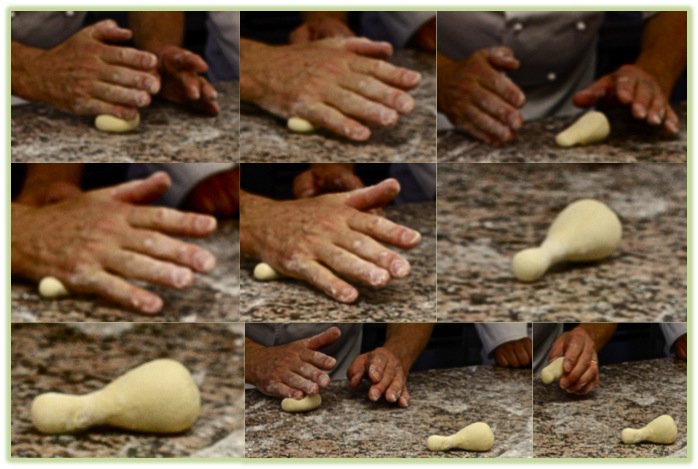
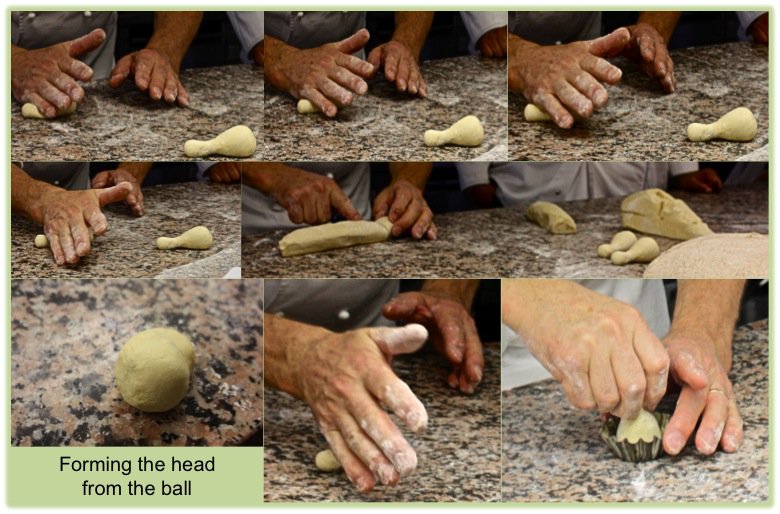
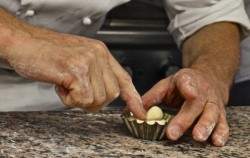
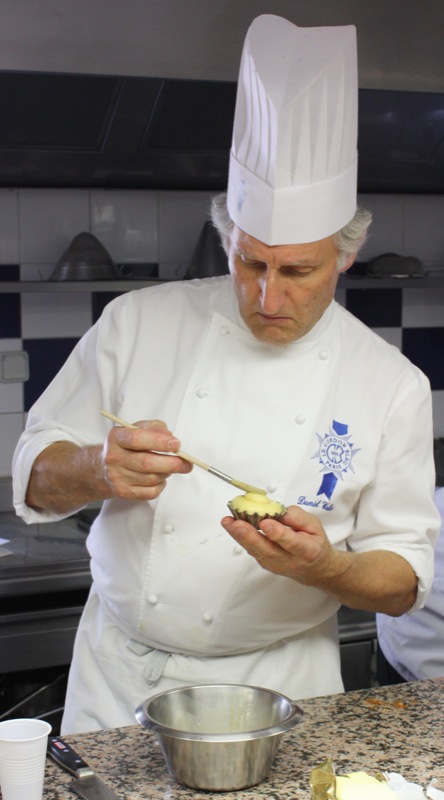
You can see how Chef Walters uses his baby finger to etch out about 1/4 to 1/3 of the dough ball. Then, continuing to use the side of his hand with gently and even pressure, he forms what looks like a bowling pin. He did it over and over exactly the same way.
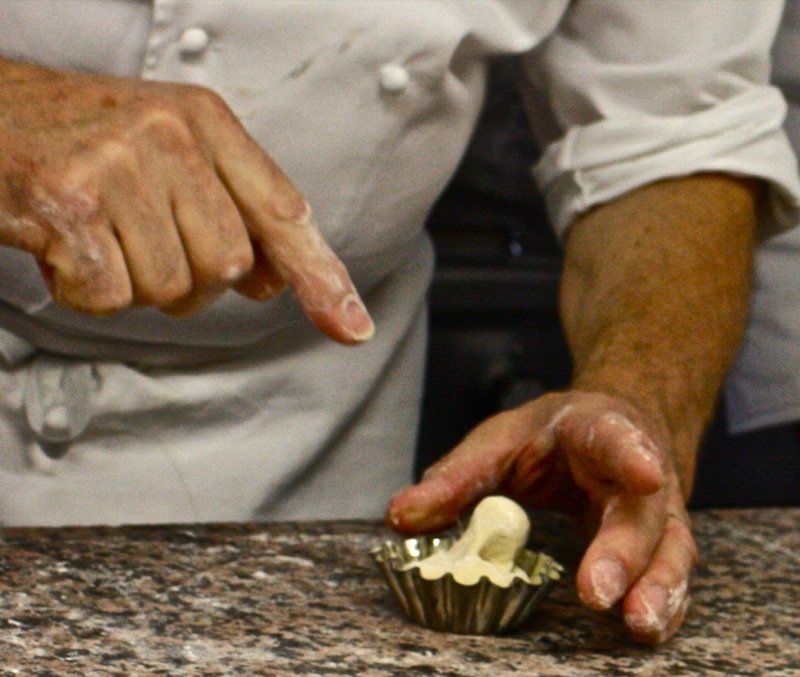
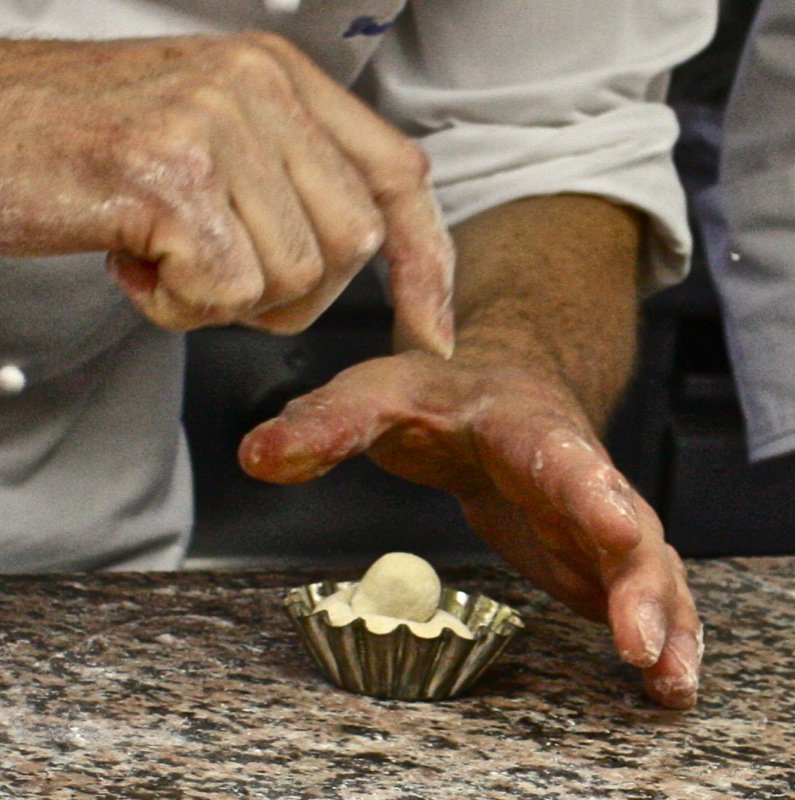
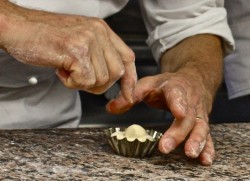
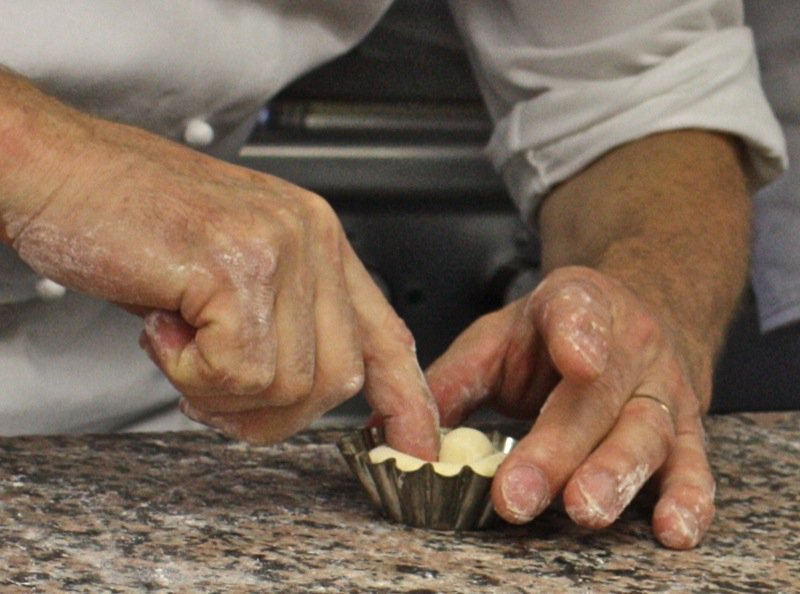
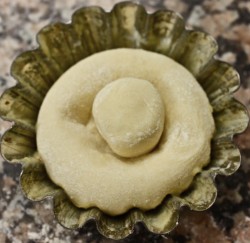
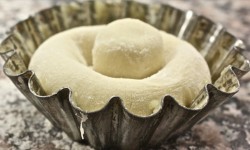
But, before we had at it, he showed us how to tuck in the head to get it to stand up straight. You can see above that he has plopped the dough into the form and then uses his forefinger to nestle the head into the ball, upright.
Below, he has completed one side.
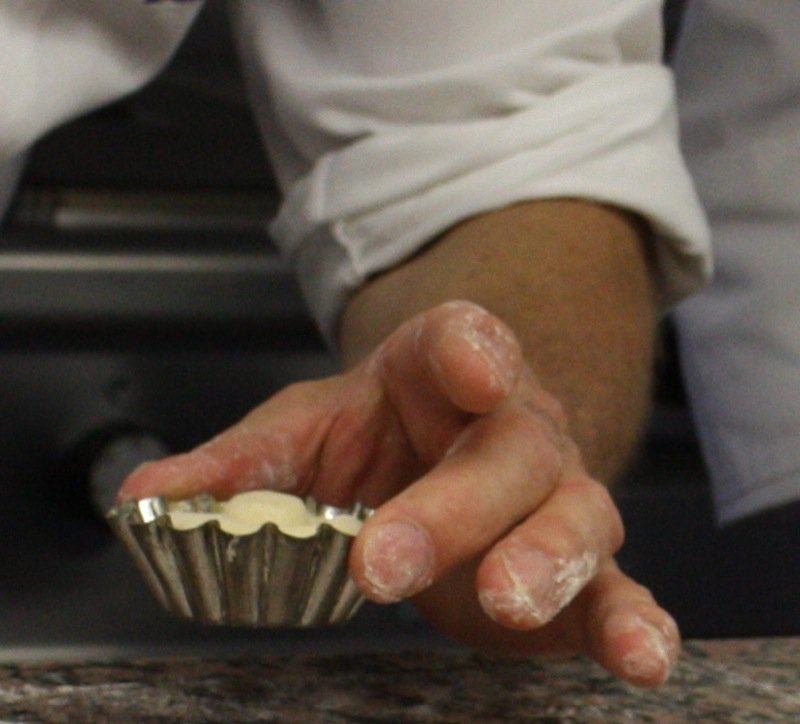
In slow motion, he will do the other side.
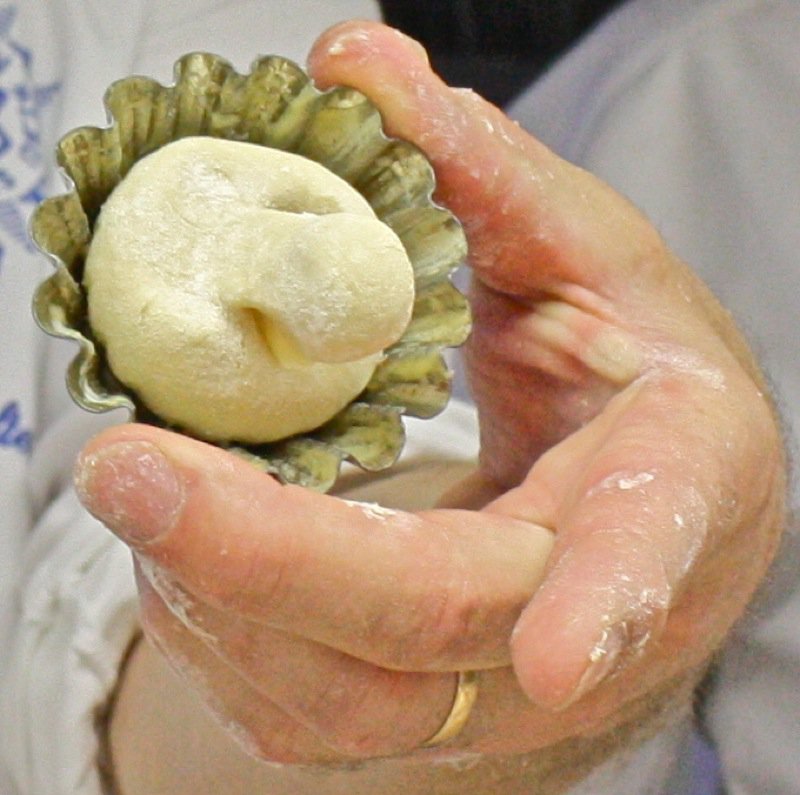
Do you see how he aims at a 45 degree angle and pushes the space in under the head. He repeats this all around the head and then it sits on top, happily.
You will see it nestled in position, below, right.
This is Chef Walter’s brioche, above. Mine are below… well, his is, too.
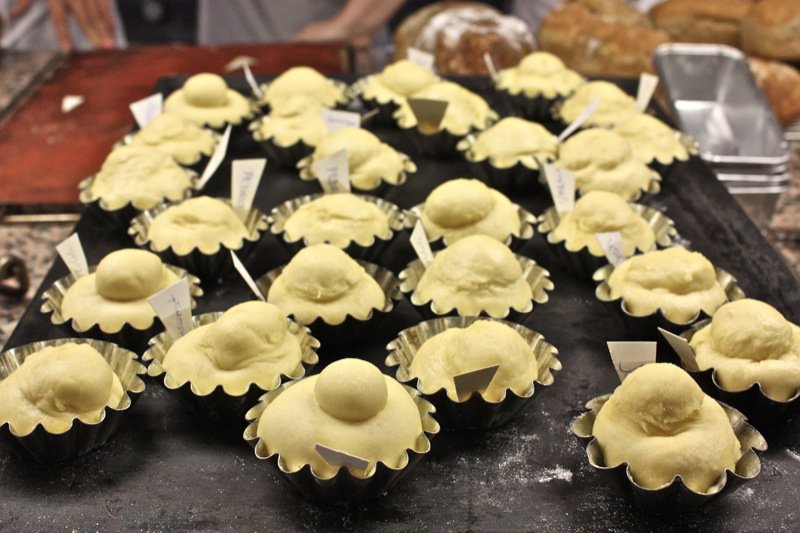
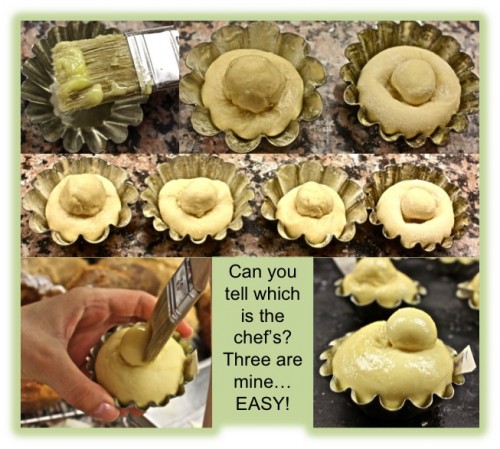 Seeing the student brioche forms, and comparing it to my own pan, had me really astounded at how well he had taught us. I was afraid when I began. Not afraid to fail, just afraid I would not learn how to do it better… and then maybe be too discouraged to want to make them again.
This is the Chef’s. He said it was “OK”. He wasn’t happy. I thought it was a masterpiece… but, I do understand. Richard Bertinet’s brioche that he demonstrated for us leaned over when baked. I love the charm in that, too.
He was very happy with the crumb in these, and that might help you to understand why I was so pleased with the crumb in mine! Below are my oven ready brioche… just for a little last minute comparison!
I cannot wait to make them again. I have, actually, a few times, since this… and I am thrilled at how easy they are to make, now that I know how!
Richard Bertinet’s Brioche Recipe (from Crust) adapted for the Thermomix (by moi, above)
Ingredients:
- 500g white bread flour
- 50g sugar
- 15g fresh yeast
- 10g salt
- 350g egg (@6 large eggs)
- 250g unsalted, cold butter
- egg wash: 1 egg beaten with a pinch of salt prepped one hour before it is needed
Instructions for the Thermomix:
- Weight the butter, and cut the butter into small cubes
- Lightly grease the brioche tins (or muffin tins) with butter
- Scale flour, sugar, yeast and salt into TM bowl; combine for 5 seconds at speed 4-5
- Scale in the yeast; combine for 5 seconds at speed 4-5
- Scale in the eggs; combine for 30 seconds at speed 4-5 using the spatula through the hole in the lid to keep the dough close to the blade
- Knead the dough for 5 minutes on the interval speed
- After 2 minutes of kneading, add the butter through the hole in the lid during the next 30 seconds; continue to knead until the time is up
- Very lightly dust the work surface with flour; empty the dough completely from the TM bowl onto the lightly floured surface; form into a ball
- Place ball into a lightly floured bowl, cover with a cloth and rest the dough for two hours
- Turn the dough out onto a lightly floured surface with a scraper (see my Bertinet post for how to do this) and fold; reform into a ball
- Replace into the lightly floured bowl and let it rest over night (or 12 to 14 more hours) in a cool place 10-12°F (not a fridge)… (I confess. I did not do this part. I went straight to #14, but resting the dough for this length of time develops the flavour profile and the texture)
- Preheat the oven to 400°F
- Remove the dough from the cool place to a room temperature space for an hour
- Place dough on lightly floured surface and divide into fifteen 70 gram portions; follow the instructions in the photos above to form into a brioche
- Place into buttered tins; cover and rise for 2 1/2 more hours
- Prepare egg wash an hour before needed: cover each with egg wash and bake for 10 to 15 minutes until dark golden
- Remove from tin and place on wire rack to cool
Christian Stinner’s Thermomix Brioche Recipe (as adapted from the Australian Thermomix Cookbook)
Ingredients:
- 150g sugar
- 440g milk, warm
- 10g yeast
- 5g salt
- 80g soft unsalted butter
- 650g flour
- 1 egg
Instructions for the Thermomix:
- Scale sugar into the TM bowl; pulverize 3 seconds at speed 9
- Scale milk, yeast, salt, butter, flour and egg into the TM bowl; mix to combine 10 seconds at speed 7
- Set dial to closed lid position and knead for 3 minutes at interval speed
- Remove dough to a lightly floured bowl covered with a tea towel; proof until double in size (about 60 minutes)
- When risen, heat oven to 200°C or 400°F
- Place dough in a buttered bread or brioche tin(s) or weigh dough into 50-60g portions and form into individual brioche (as pictured above)
- Let rise again to nearly double in size; brush with an egg wash and sprinkle with sugar, etc, if desired
- Bake in hot oven until golden brown and sounding hollow when tapped; about 20-25 minutes for whole brioche and 15-20 minutes for individual ones
Thermomix Brioche Recipe for large “one loaf” brioche form (which is the one I used the second time and it was also fantastic, but a very sticky dough)
Ingredients:
- 215g flour
- 6g salt
- 10g dry yeast
- 3 eggs
- 25g castor sugar
- 40mls milk
- 135g soft unsalted butter
Instructions for the Thermomix:
- Place milk in TM bowl and heat on 37°C for 3 minutes on speed 1
- Add all other ingredients and mix on speed 5 for 5 seconds
- Turn lid to “closed lid position”; set time for 5 minutes and speed on Interval seeting: knead for 5 minutes
- Place mixture in a lightly floured bowl and rise to double in size
- When risen, heat oven to 220°C or 425°F
- Place dough in a buttered bread or brioche tin forming the little bobble on top per instructions in photos; rise to nearly double in size
- Brush with an egg wash and sprinkle with sugar, etc, if desired
- Bake in hot oven until golden brown and sounding hollow when tapped; about 20-25 minutes for whole brioche and 15-20 minutes for individual ones
Note: This is a very sticky dough and would be very difficult to form individual brioche with, but it makes an incredibly rich and delicious brioche!
Tip: Sprinkle with Demerara sugar, or dried fruit and nuts before baking
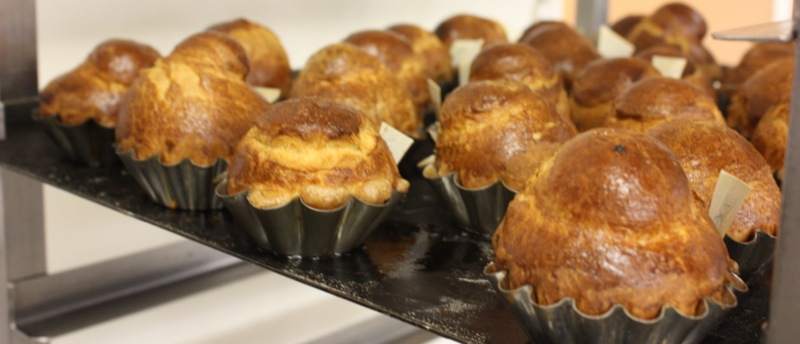
And, in case you think I showed you the only one that turned out…. no, no… no. They all did!



These are excellent petite little brioches. Your instructions are so very helpful. I must try these very soon.
Bravo! Wonderful job! I’m sure you’ve seen my lopsided brioche in my header. I’ll need to take a closer look the instructions 🙂
Susan!
Yes, I have seen your lopsided brioche – and LOVE it. Richard Bertinet’s was lopsided when he demonstrated them to us, and you saw how Chef Walter’s turned out in this post (and he is from Le Cordon Bleu), so… love the lopsided heads! But, that is also why I was tripley thrilled when my little heads were standing at attention!
What fun!
🙂
valerie
Beautiful! Now I want a thermomix!!! I’m not even sure if they sell them in the States but the dough is amazing. Honestly- yours look better than the ones made in the class.
El! I know! Wasn’t I lucky!!! They do NOT sell Thermomix in the US”¦ but, should you ever be serious, I sell them and can ship to you within 7 to 10 business days. Lucky me, eh? I have two, I love using mine so much. Mind you”¦ I sell them. I did make the brioche by hand, first. I do believe in doing everything by hand ““ first, so you know what you are looking for and what to do”¦ but after that, hey”¦ I would never be making bread daily and such, with out my Thermomix!
🙂
Valerie
Did you have the brioche and foie gras at the French Laundry? It was the highlight of the dinner, as far as I’m concerned. 🙂
Tara!
It was the highlight of my dinner there, too. Best brioche ever – and the foie gras is what motivated me to make my own foie gras au torchon! Superb!
🙂
Valerie
WOW! I am SO impressed! I’ve been wanting to make brioche for ages and just haven’t had a chance. Yours are absolutely gorgeous and I’d love to sink my teeth into one right this very minute. 🙂
Hello again 😉
Honestly, I have never heard of a brioche. They remind me of those Yorkshire pudding. This looks much more complicated than a Yorkshire Pudding though. Then again, I know nothing about baking so I really hope I’m not insulting you by saying it looks like a Yorkshire. Your brioche look beautiful. I really cannot tell which is yours and which is Chef Walter’s. I can tell that this is another one of those things that look and sounds so easy, but when you get to doing it, nothing goes right. The pros always make everything look easy 😉 This human cookbook sure is expanding with recipes by the day. I’m also curious, do you use a program to store all your recipes, pen and paper, or just by memory? I’ve been bookmarking so many recipes that the OCD in me is starting to itch at organizing them somehow.
Le Quan….
I store my recipes as I do on my site… Mainly, my site is my first line of reference through the recipe index. It is now alphabetized. YAY.
I have all my other recipes on my hard drive in folders. Recipes: then many folders like: Appetizers, Soups, Salads, Mains, Desserts… etc (just like a cookbook) and the recipes are stored in each one. I have two sets like this. One set of the tried and true family traditional recipes, and another set that I am gleaning from the posts i read that I want to try. It is my new year’s resolution to try many of those!
🙂
Valerie
Yes, I really need to organize my blog too. But I wouldn’t have that many to organize, that’s partly why I’ve been putting it off…teehee. Thanks for the tips!
Making your own brioche? How wonderful, how adventurous! Your finished product looks positively lovely and inspires me to want to try it too. First my plan is to really get my regular bread technique down. I am still working on the “Kneading”
*kisses* HH
HH – I bought both books: Crust and Dough by Bertinet – before I took the course, and practised the kneading for a year… just by watching his video. He was impressed at the class and I improved immediately with that practice under my belt and his immediate coaching. I was beaming. I love his technique, but it does take a whole lotta practice.
🙂
Valerie
Amazing job on the brioche, Valerie! Thanks so much for sharing your lesson at Le Cordon Bleu with us, the pictures are really helpful. I need to buy brioche tins and when I do, I will be referring back to this post! 🙂
NICE work! These are beatiful. There’s also the “cheating” method for making brioche heads sit up straigt: Divide the dough for each brioche into two pieces, one large and one small. Form the large one into a “donut” shape and the small into a “tadpole.” Slip the tadpole end into the donut hole and voila! This sounds so graphic. Sorry!
I’m sure Chef Walters would disapprove 🙂
Valerie, you brioche rolls look absolutely perfect! Seriously, beautiful and I bet they are so good, brioche is always my favorite. Very cool to make it in Thermomix too, still would love to get my hands on that one day 🙂
Your brioche are magnificent…wow!
And what a wonderful post and tutorial here, excellent 🙂
Ooh, that’s a lot of work, Valerie, but it looks so worth it. I want one of those with butter right now;)
Hi Valerie, such beautiful masterpiece and Tq for such great sharing. May I clarify on the step 3&4 Richard bertinet’s recipe, the yeast scaled in for twice?
Thank you for catching that! Yeast should never touch salt so omit the yeast in step 3 and add it in step 4. I will correct the recipe when I get home! 🙂 let me know how it goes!
Hugs,
Valerie
I did answer Soon, hope you got the response, but yes – add the yeast in step 4, not 3. 🙂 V